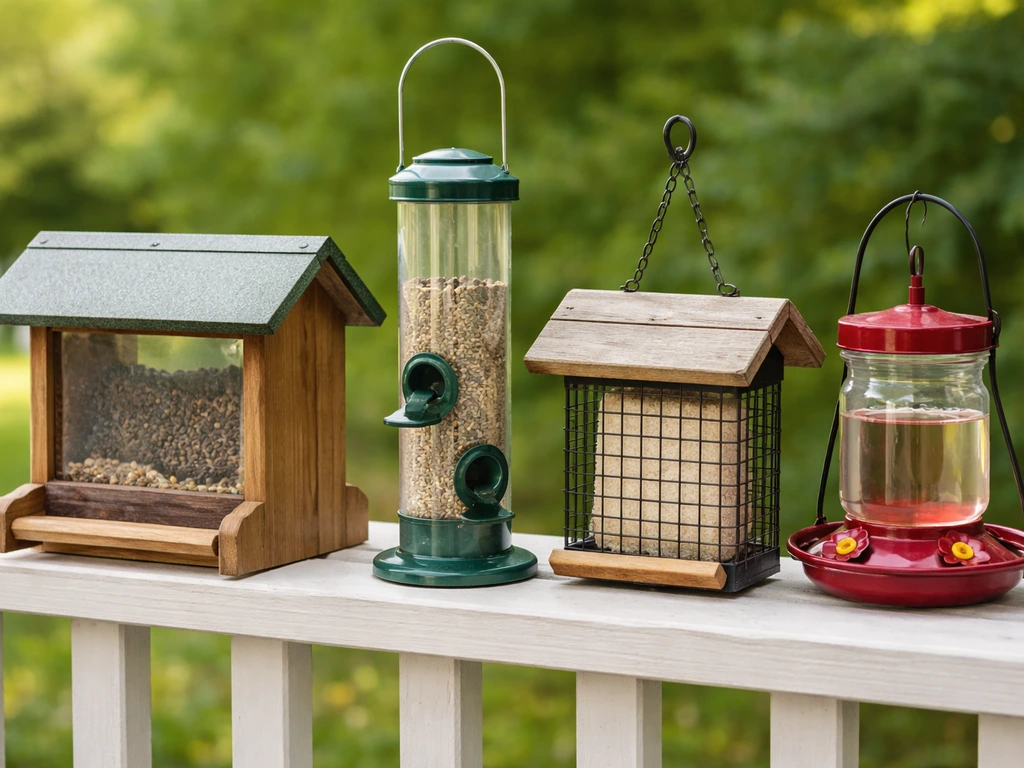
You can build a genuinely good bird feeder today with basic tools, scrap wood, a plastic bottle, or a piece of hardware cloth. The best DIY design depends entirely on which birds you want to attract: a simple platform feeder with a roof draws cardinals and jays, a mesh suet cage from 1/2-inch hardware cloth brings in woodpeckers, a plastic bottle with small drilled ports works for finches, and a glass jar with a red lid and a feeding tray makes a functional hummingbird feeder. Each of those takes under two hours, costs next to nothing, and outperforms a cheap store-bought feeder in several real ways. But there are limits, and it's worth knowing them before you start cutting.
Best DIY Bird Feeders: 7 Easy Homemade Designs

Marcus Holloway
21 May 2026

Why DIY beats buying (and when to skip it)
The honest case for building your own feeder isn't that it's always cheaper or always better. It's that you can customize exactly what a $12 plastic feeder at a hardware store can't: port size for a specific seed, roof depth to keep rain off sunflower chips, wire spacing matched to the bird you want, or a baffle built directly into the pole. I've replaced three flimsy tube feeders that cracked after one winter, and the PVC pipe version I built to replace them is still standing.
DIY also makes sense when you want a feeder style that's hard to find cheaply, like a large open platform, a tail-prop suet feeder for woodpeckers, or a nectar feeder with an integrated ant moat. You can build all three for under $15 combined in materials.
That said, skip the DIY route when you need something highly precise or failure-prone to build at home. A weight-sensitive squirrel-proof tube feeder with a closing ring mechanism is genuinely hard to replicate without machining. Camera-enabled smart feeders that use AI to identify species are completely out of scope for a home build.
If you're dealing with a chronic squirrel problem or you want to monitor which birds are actually visiting, a purpose-built specialty feeder or a smart bird feeder camera is going to outperform anything you can cobble together. If you need more than a DIY hack, the best backyard bird feeders are often purpose-built for persistent squirrels and recordable bird visits. More on upgrade paths at the end.
Best DIY bird feeder designs by bird type and feeder style
Different birds have different feeding postures, seed preferences, and comfort levels with open versus enclosed spaces. Matching the feeder design to the bird is the single most important decision you'll make.
Cardinals and large perching birds: hopper or platform feeder
Cardinals don't like to cling. They want a solid perch and enough room to sit and eat without feeling crowded. A hopper feeder (a seed reservoir with side-perch ledges and a roof) or a simple open platform with a 1-inch lip to keep seed from blowing off are both ideal. Sunflower seeds and safflower are the draws. Platform size of at least 10 x 14 inches gives multiple birds room to feed without constant chasing.
Finches: small-port tube feeder
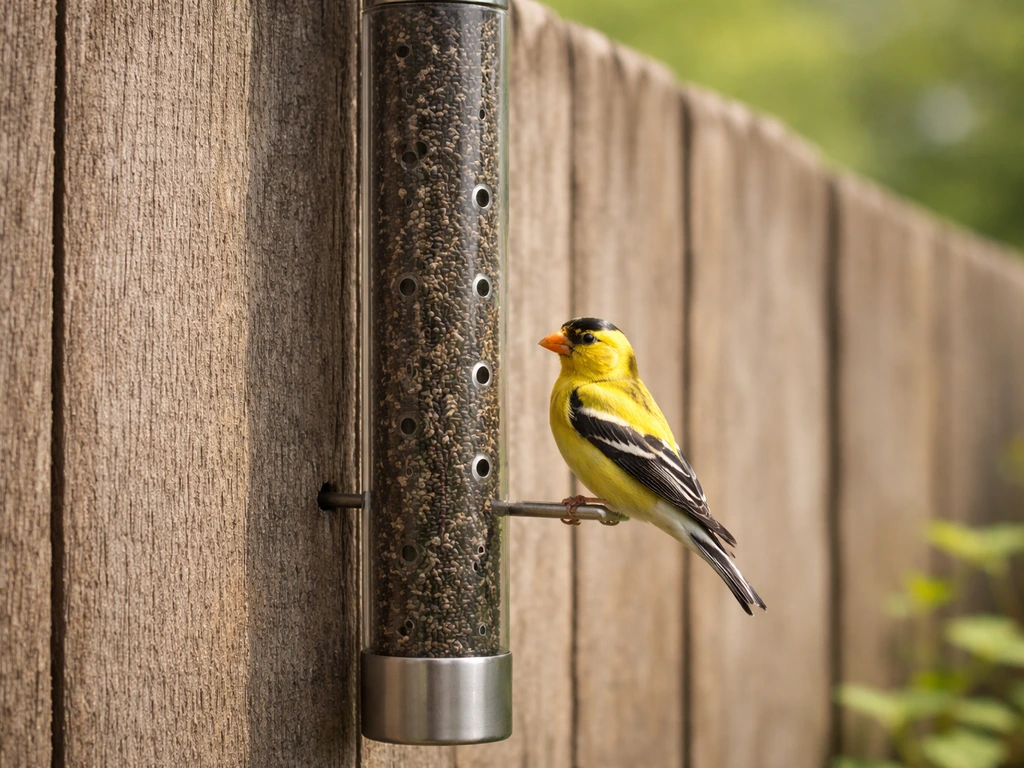
Goldfinches and house finches love nyjer (thistle) seed, and nyjer requires feeders with small feeding ports, around 1/8 inch in diameter, to prevent the tiny seeds from spilling out. A tube feeder is the go-to design: a hollow cylinder with multiple ports and perches drilled around the outside. You can build one from PVC pipe, a clear acrylic tube, or even a repurposed plastic bottle. The key spec is port size. Too big and the seed pours out. An alternative is a mesh sock-style feeder, which you can replicate with fine wire mesh formed into a tube, but PVC is more durable long-term.
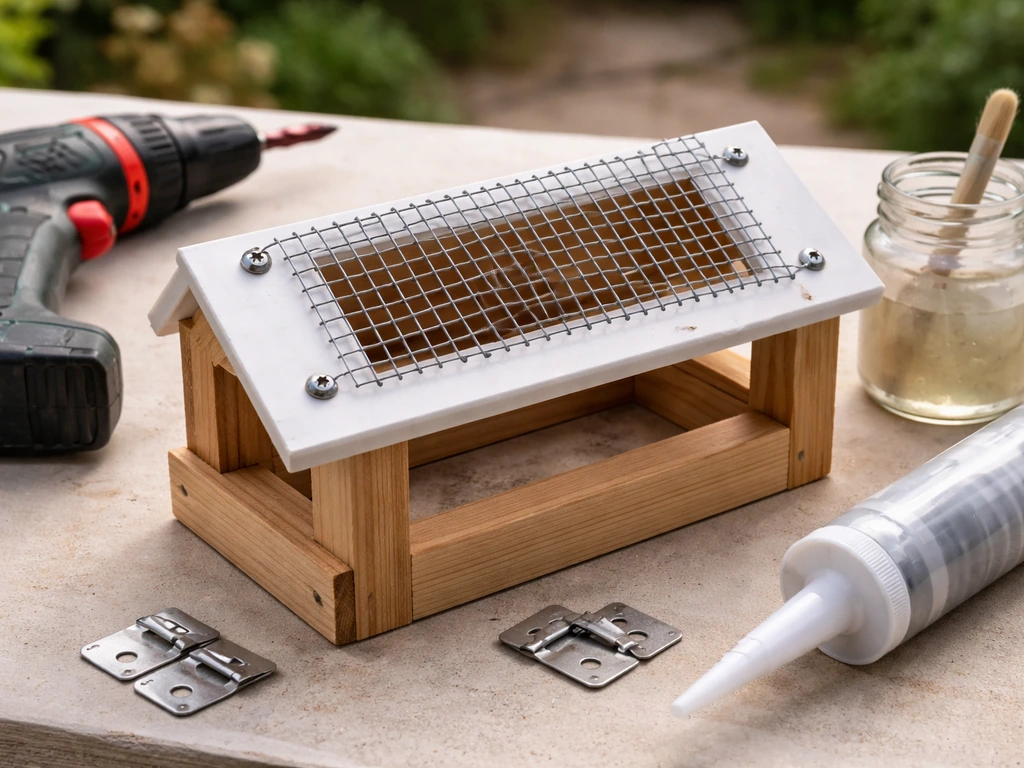
Woodpeckers: suet cage feeder
Woodpeckers, including downy, hairy, and red-bellied species, are cling feeders. They don't perch conventionally; they grip vertical surfaces and peck. A suet cage feeder made from 1/2-inch hardware cloth gives them something to grip while accessing suet from the mesh openings. The 1/2-inch spacing is the right call: tight enough to hold a suet cake securely, open enough for a bird to peck through. For larger species like pileated woodpeckers, consider a tail-prop design, a board below the cage that the bird can brace its tail against, which reduces effort and increases visit time.
Hummingbirds: nectar jar feeder
A glass jar (a small mason jar works perfectly) fitted with a red plastic lid drilled with feeding ports and inverted over a shallow tray is the simplest DIY hummingbird feeder. Nectar is 4 parts water to 1 part plain white sugar, boiled to dissolve. No red dye needed and no honey, which can cause fungal growth. The challenge with DIY nectar feeders is leaks attracting ants, so build an ant moat into the hanging hardware from the start (a small plastic bottle cap or a store-bought moat filled with water works). More on that in the pest section.
Mixed backyard birds: open platform feeder
If you want to attract the widest variety of species, a simple elevated platform with drainage holes and a roof overhang is hard to beat. Mourning doves, sparrows, juncos, cardinals, and even the occasional towhee will all use it. The roof keeps seed dry, the drainage holes prevent rot and mold, and the open design lets skittish birds see predators approaching. This is also the easiest feeder to build with basic woodworking skills.
Materials, tools, and weather-proofing for long-lasting feeders
Wood, PVC, wire mesh, and glass all work for different feeder types. The material choice determines how long the feeder lasts, how easy it is to clean, and whether it stays safe for birds. Here's how they stack up.
| Material | Best for | Weather resistance | Easy to clean | Notes |
|---|---|---|---|---|
| Cedar or redwood | Platform, hopper feeders | Excellent (naturally rot-resistant) | Good | No paint or sealant needed; avoid pressure-treated wood (toxic chemicals) |
| PVC pipe | Tube feeders | Excellent | Very good | Lightweight, doesn't rot, easy to drill ports |
| 1/2-inch hardware cloth | Suet cages | Good (galvanized) | Fair (scrub with brush) | Stainless is better long-term; standard galvanized works for years |
| Glass jar | Hummingbird nectar feeders | Excellent | Excellent | Dishwasher safe; no plastic leaching risk with nectar |
| Untreated pine | Platform, hopper feeders | Fair (needs coating) | Good | Seal with exterior-grade non-toxic finish; will rot without treatment |
| Plastic bottles | Quick tube feeders | Fair | Fair | Cheap and fast but degrades in UV over 1-2 seasons |
For tools, you need very little: a drill with bits (1/8-inch for nyjer ports, 3/8-inch for sunflower ports, 1-1/2-inch hole saw for dowel perches), a jigsaw or handsaw for wood, tin snips for hardware cloth, and pliers. A staple gun helps for attaching mesh to a wood frame.
Weather-proofing comes down to two things: keeping water out and keeping the feeder from rotting where it touches a pole or rope. Use cedar or PVC wherever possible. If you use pine, coat the outside with an exterior-grade, water-based polyurethane or linseed oil. Never use oil-based paints or stains where birds might peck, and avoid pressure-treated lumber entirely since the preservatives are toxic. For suet cages, go galvanized or stainless hardware cloth and use stainless screws. Zinc or regular steel will rust through in two seasons.
Mounting, placement, and clean-up for backyard success
Where to put your feeder
Placement matters more than most people think, and it affects both bird safety and how much you actually see. The main risk is window collisions. Project FeederWatch’s window-collision study materials also support measuring the shortest window-to-feeder distance for recording purposes the main risk is window collisions.
Research from All About Birds and Project FeederWatch consistently shows that feeders placed within 3 feet of a window are safer than feeders placed at mid-range distances like 10 to 15 feet. At close range, birds don't build up enough speed to injure themselves if they do fly toward the glass. Past 30 feet is also relatively safe because birds have time to course-correct. The dangerous zone is in between.
So if you're hanging a feeder near your house, get it close: mount it on a window bracket or hang it right outside a patio door.
Beyond window safety, place feeders near shrubs or small trees so birds have quick escape cover but not so close that cats or squirrels can ambush from the branches. Around 8 to 10 feet from cover is a reasonable balance. Hummingbird feeders do well in partial shade since nectar ferments faster in direct sun.
Mounting options
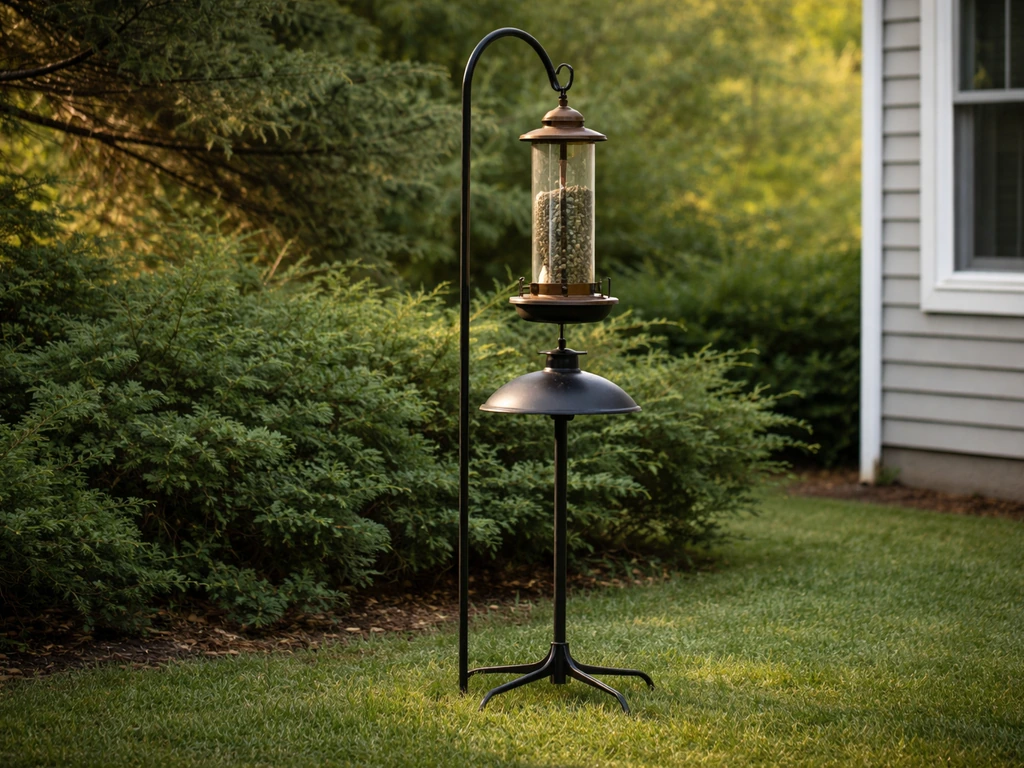
- Pole-mounted: a smooth metal pole with a baffle below the feeder is the best all-around setup for squirrel control; the pole should be at least 5 feet tall and the feeder at least 10 feet from any launchable surface
- Hanging from a wire: use a baffled hanging cord or a shepherd's hook with a dome baffle above the feeder
- Window-mounted: suction-cup brackets or window clamps keep feeders within 3 feet of glass, which is ideal for safety and birdwatching
- Post or deck-railing mount: works well for platform feeders; drill drainage holes and make sure the post is stable enough that wind doesn't knock seed out
Keeping feeders clean
This is where a lot of home feeders fail. Dirty feeders spread salmonella, aspergillosis, and other diseases that can kill birds at the feeder. The baseline recommendation from Project FeederWatch is to clean seed feeders every two weeks, and more often during warm or wet weather. For disinfection, a diluted bleach solution is the standard: around 2 ounces of bleach per gallon of water (Minnesota DNR's guidance), or a 9:1 water-to-bleach ratio if you want to be more precise. Soak feeder parts for about 10 minutes, scrub with a bottle brush, rinse thoroughly, and let dry completely before refilling. Wet feeders fill up with mold faster than dirty ones.
For hummingbird feeders specifically, clean every 2 to 3 days in summer and every 4 to 5 days in cooler weather. Nectar ferments fast and cloudy or stringy nectar is harmful. A glass jar feeder makes this much easier because you can run it through the dishwasher.
Predator- and pest-proofing (squirrels, grackles, rats, ants)
Squirrels
Squirrels are the most persistent problem in backyard feeding, and the honest answer is that no single DIY solution is fully squirrel-proof. What works: a smooth metal pole (they can't grip it), a dome baffle above or below the feeder (they can't get around it if it's at least 15 inches in diameter), and keeping the feeder at least 10 feet horizontally from any jump point (trees, fences, rooflines). You can build a basic dome baffle from a large metal bowl or an inverted plastic salad bowl threaded onto the pole. It's not pretty, but it works. What doesn't work reliably: grease, hot pepper flakes in seed (inconsistent deterrent and messy), or relying on feeder placement alone without a baffle.
Grackles and large nuisance birds
Grackles are frustrating because they're smart, bold, and eat everything. DIY solutions are limited. Switching to a cage-style feeder where the outer wire cage only allows small birds through is the most effective approach. You can build a simple cage from hardware cloth around an existing tube feeder, with openings sized around 1.5 inches so small birds pass through but grackles can't fit. Removing open platform feeders temporarily and switching entirely to nyjer in small-port tube feeders is another route since grackles rarely bother with nyjer. Safflower seed is also something many grackles avoid while cardinals and chickadees eat it happily.
Ants
Ants are almost entirely a hummingbird feeder problem, drawn by nectar leaks and the sugar scent. The ant moat is the most reliable DIY fix: a small water-filled cup hung above the feeder on the hook so ants have to cross standing water to reach the nectar. They won't. You can make one from a plastic bottle cap with a hole drilled through the center (thread your hanging wire through it and seal around the wire with silicone) or buy a cheap moat for a dollar or two. The key is keeping the moat filled; if it dries out, ants cross freely. Also check for nectar leaks around ports, which is what attracts ants in the first place.
Rats and mice
Rodents are attracted to seed that falls on the ground, not usually to the feeder itself. The fix is two-part: use a seed catcher tray below the feeder to reduce ground spillage, and switch to no-waste seed mixes (hulled sunflower chips, nyjer) that leave less debris. Clean up ground seed every few days. If you're seeing rats consistently, consider suspending feeding temporarily until the population drops, then resume with a tray and cleaner seed.
Easy step-by-step build plans (with measurements)
Build 1: PVC tube feeder for finches
This feeder handles nyjer or mixed small seed and lasts for years with minimal maintenance.
- Cut a 2-inch diameter PVC pipe to 14 inches long using a hacksaw or PVC pipe cutter
- Cap the bottom with a 2-inch PVC end cap (press-fit or glued with PVC cement)
- Drill 1/8-inch feeding ports in pairs around the tube, starting 2 inches from the bottom, spacing pairs about 3 to 4 inches apart vertically and rotating 90 degrees between each pair
- Drill 1/4-inch holes just below each port pair and press in 4-inch lengths of 1/4-inch wooden dowel (these are the perches; glue them in with wood glue)
- Drill a 1/4-inch hole through the top end cap and thread a loop of stainless steel wire through it for hanging
- Fill with nyjer seed through the open top, then press on the top cap (leave it unglued so you can refill and clean)
Build 2: Hardware cloth suet cage for woodpeckers
This cage holds one standard suet cake (approximately 4.5 x 4.5 x 1.5 inches) and can be mounted flat against a tree or hung from a branch.
- Cut two pieces of 1/2-inch galvanized hardware cloth to 5 x 6 inches each (these are the front and back panels)
- Cut four pieces to 2 x 6 inches for the sides
- Use pliers to bend and fold the edges of the mesh pieces, then connect them with stainless steel wire at each corner to form an open box; leave one of the 5 x 6-inch panels as a hinged door
- Attach the door panel at the top with a small loop of wire so it can swing open for suet replacement
- Add a stainless wire hook at the top for hanging, or screw two small eye-bolts at the top corners for mounting against a tree trunk with screws
- For a tail-prop design, attach a 6-inch strip of 1/2-inch hardware cloth below the cage as a vertical brace surface
Build 3: Open platform feeder for cardinals and mixed birds
- Cut a piece of cedar board to 12 x 16 inches for the platform floor
- Drill 1/4-inch drainage holes every 3 inches across the platform surface in a grid pattern
- Cut four cedar strips at 1 x 1 x 16 inches and 1 x 1 x 12 inches to form a lip around the edge (prevents seed from blowing off); nail or screw them flush to the edge of the platform
- Build a simple gabled roof using two cedar pieces 10 x 18 inches each, joined at the top with a ridge board at a 45-degree angle, and attach to two 8-inch tall vertical supports at each short end of the platform
- Sand all edges smooth (rough edges can snag or injure birds)
- Mount on a smooth metal pole using a pipe flange screwed to the underside of the platform, or hang from four eye-bolts at the corners using chain or rope
Build 4: Mason jar hummingbird feeder
- Take a wide-mouth half-pint mason jar and a standard metal lid band (the outer ring only, not the flat disc)
- Cut a circle of red plastic sheeting (from a folder, craft foam, or similar) to fit inside the lid band
- Drill 4 to 6 holes, each about 3/16 inch in diameter, evenly spaced around the red plastic disc
- Thread a stainless wire loop through the lid band for hanging
- Mix nectar: dissolve 1 part plain white sugar in 4 parts boiling water, cool completely before filling
- Fill the jar with nectar, press the red plastic disc into the band, and invert the jar over a small tray (a jar lid works) to catch drips
- Hang with an ant moat above the hanging point: thread the wire through a bottle cap filled with caulk or silicone, leaving a small well that you fill with water
Maintenance, troubleshooting, and when to upgrade to specialty or smart feeders
Routine maintenance schedule
| Feeder type | Clean frequency | Refill check | Watch for |
|---|---|---|---|
| Seed tube (nyjer or sunflower) | Every 2 weeks minimum; weekly in summer | Every few days in peak season | Clumped or moldy seed near ports; cracked PVC |
| Suet cage | Monthly; after each suet cake | When suet is gone | Rancid suet smell; rust on mesh |
| Platform feeder | Weekly; after rain | Daily in active season | Wet or clumped seed; hull buildup causing drainage blockage |
| Hummingbird nectar | Every 2 to 3 days in summer; every 5 days in cool weather | Same frequency as cleaning | Cloudy, stringy, or discolored nectar; ant activity |
Common problems and fixes
- Birds not visiting: check that seed is fresh (nyjer goes stale fast), confirm feeder is visible from a perching spot nearby, and give it 1 to 2 weeks after first setup since birds take time to find new feeders
- Seed clumping or molding inside a tube: the tube isn't draining or airflow is poor; drill a few small holes at the very bottom of the tube, and don't overfill in humid weather
- Hummingbird feeder leaking: the jar seal or port fit is loose; re-seat the disc, add a thin rubber gasket, and reduce nectar level slightly to cut pressure
- Suet disappearing overnight: raccoons or opossums are raiding the cage; add a latch to the door and consider bringing the feeder in at night until the problem passes
- Sparrows and starlings taking over a platform feeder: remove millet and bread crumbs, switch to safflower or nyjer which house sparrows and starlings mostly ignore
When to stop DIYing and upgrade
There are a few situations where a purpose-built feeder is genuinely the better call. If squirrels are defeating every baffle you build and destroying feeders faster than you can replace them, a weight-activated closing-ring feeder is worth every penny because the mechanism simply can't be replicated at home.
If you're trying to attract woodpeckers consistently, commercial suet feeders built from stainless steel and aluminum (like the designs made specifically for that purpose) outlast galvanized hardware cloth by years and hold up to the repeated pecking stress better.
And if you want to actually know which species are visiting, or you're dealing with a recurring grackle or house sparrow invasion and want to understand the patterns, a smart bird feeder camera with species identification is a different category of tool entirely. DIY feeders are great for feeding birds; they're not great for monitoring or analysis.
The wooden feeder category is also worth flagging: if you enjoy the aesthetic of a well-made wooden hopper or platform and want something that lasts a decade rather than two to three seasons, quality commercially-made wooden feeders use joinery and weather-resistant wood treatments that are genuinely hard to replicate without solid woodworking experience. For specific species setups like woodpeckers or finches, specialty feeders designed for those birds solve problems that a general DIY build sometimes can't. The DIY route is the best starting point for almost anyone, but it's a starting point, not always the final destination.
FAQ
Can I use one DIY bird feeder design for more than one type of seed?
Yes, as long as you match the port size and seed type. For example, nyjer can work in DIY PVC or bottle tube feeders only if the drilled holes are about 1/8 inch, otherwise the seed spills and attracts more pests. If you want one feeder to handle multiple seeds, build separate feeding ports or keep to a single seed to avoid constant clogging and uneven feeding.
What’s the best material to prevent DIY feeders from rusting or failing early?
If you build with hardware cloth, use stainless or galvanized and keep the wood off metal joints when possible. Even if your cage is rust-resistant, screw holes can corrode first, then widen and create sharp edges. If you see any blackened rust dust on the mesh, replace the cloth section rather than sanding it down.
How can I check my DIY feeder won’t leak seed or nectar before installing it?
Use a simple seed “test load” before hanging it outside. Fill with the seed you plan to use, then tip the feeder slightly and shake it gently over a tray to see how much leaks or spills through ports and seams. If you get more than a small pinch, reduce port size, add a short drip lip under ports, or re-seat the jar lid or tray so nectar and sugar do not escape.
What are common mistakes that cause DIY feeders to attract the wrong birds or spill seed?
For finches and nyjer, avoid larger mesh openings that let tiny seeds work their way out. If you’re using tube ports, keep them consistently sized and clean any burrs from drilling because rough edges can catch seed and create blockages. For hummingbirds, don’t add dye, and always boil and fully dissolve sugar, otherwise you increase fermentation and cloudy nectar buildup.
My feeder still gets raided by squirrels, what should I adjust first?
Don’t rely on placement alone for squirrels. Even with a baffle, raise the feeder so squirrels cannot reach it from a nearby perch, and keep at least 10 feet of horizontal distance from jump points (tree limbs, fences, rooflines). If you repeatedly see squirrels climbing the pole, upgrade to a smooth metal pole section where they cannot grip.
Where should I hang a DIY feeder if I live in an apartment or don’t have much yard space?
For window safety, the safest strategy is not “as close as possible” for every home, it’s “avoid the middle zone.” Mount within about 3 feet of a window or place it farther out where birds can correct, around 30 feet, then add visual cues like window film if you often see collisions. If you have only limited space, prioritize the close placement option mentioned in the article’s safety guidance.
How do I handle grackles without abandoning DIY feeding completely?
If grackles are forcing the issue, stop feeding the seed they dominate while you shift formats. A practical approach is temporary removal of open platforms, then switch to nyjer in small-port tube feeders, since grackles often ignore nyjer while smaller finches use it. If you’re also using safflower, consider reducing the amount so it does not build a high-value buffet on the ground and attracts more invaders.
Do baffles need specific dimensions, or can I improvise if I don’t have the exact parts?
Make the baffle and the support work together. If you build a dome baffle from a bowl, ensure the diameter is at least 15 inches and that there is enough clearance above and below the feeder so squirrels cannot reach around the edge. Also check the pole attachment, if the baffle loosens even slightly, it creates a gap squirrels can exploit.
How do I know when my cleaning schedule is too slow?
Schedule cleanings based on conditions, not just time. In hot, humid weather, increase cleaning frequency because wet feeders grow mold faster, and in winter you still need sanitation if seed stays damp or clumps. If you notice sour smells, stringy nectar, or visible mold, empty and disinfect immediately rather than waiting for the next planned clean.
Can I keep feeding outdoors if I’m worried about rodents returning?
Yes, but only if you reduce spill and keep the feeder stable. Use a seed catcher tray to capture what drops, and choose hulled sunflower chips or other low-debris mixes so there is less leftover food under the feeder. If you need to pause feeding due to heavy rat activity, resume with the tray plus cleaner seed to reduce re-inviting them.
What’s the best DIY bird feeder for a beginner who wants the quickest win?
For a safer “first DIY” choice, start with the elevated platform or hopper-style feeder sized for multiple birds and designed with a roof and drainage. These are generally forgiving for build errors compared to precision tube mechanisms. If you want to target specific birds, add only one change at a time, like switching port size for nyjer finches, so you can troubleshoot quickly.