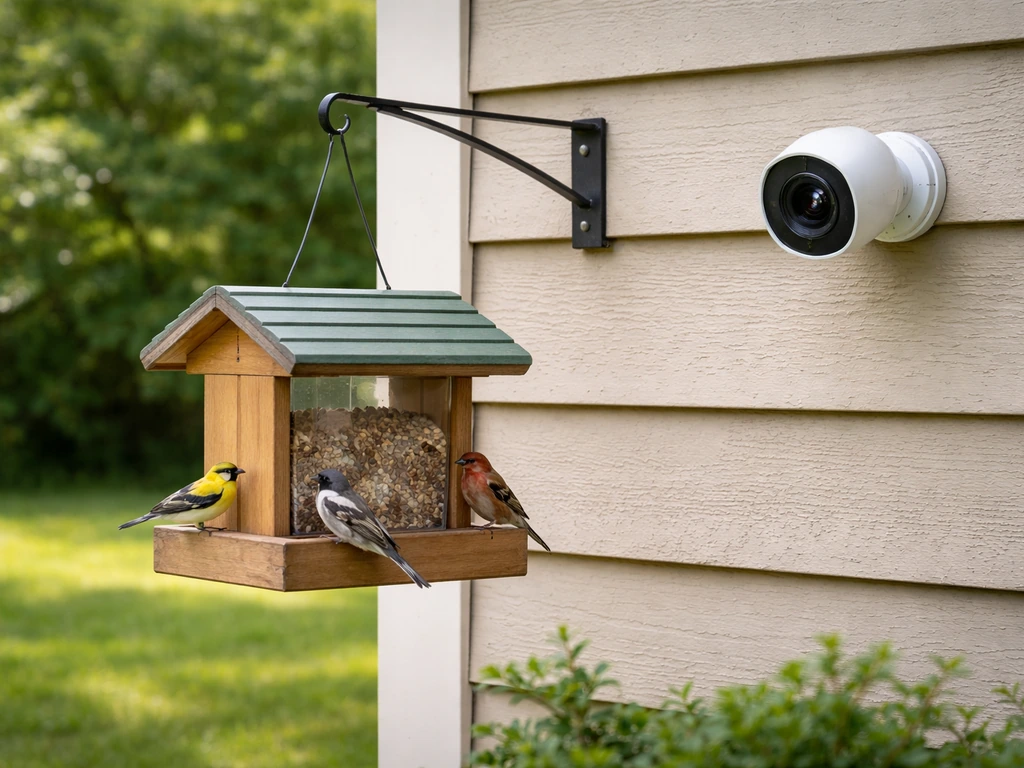
The single best spot for a bird feeder with a camera is on a north-facing wall, fence, or pole where the sun stays behind the camera rather than in front of it, at roughly 5 to 6 feet off the ground, with the feeding perch sitting 2 to 4 feet in front of the lens and a clean, dark background (like a hedge or fence board) directly behind the birds. Get those four things right and you will capture footage clear enough to identify species on the first day. Get any one of them wrong and you will spend weeks troubleshooting washed-out images, motion blur, and squirrel cameos.
Best Place to Put a Bird Feeder With a Camera in Your Yard

Marcus Holloway
14 May 2026
Start by deciding what you actually want the camera to do
Before you hammer a single mounting screw, be honest about your goals, because they change where you put the feeder. Are you mainly trying to identify species automatically with AI? Then the camera needs to be close enough to resolve feather detail, which means 2 to 4 feet from the perch, not 10. Are you trying to record video you can share or review later? Then background contrast and lighting matter more than anything else. Are you hoping to catch squirrels or predators in the act so you can deal with them? That changes the field-of-view priority completely.
You also need to map your actual constraints before you pick a spot. Walk your yard and note where you have power or Wi-Fi signal (most camera feeders need both, or a strong enough solar panel to compensate), where existing poles or mounting surfaces already exist, and which spots would give the camera a clear line of sight to your router. Units like the Netvue Birdfy and iCSee Q20 are IP65 or IP66 rated and handle rain fine, but they still need a reliable data connection to log species automatically. A perfect sun angle means nothing if the footage never uploads.
- Goal: species ID with AI — prioritize close distance (2 to 4 ft) and sharp resolution over wide coverage
- Goal: video sharing — prioritize lighting direction, background contrast, and stable mounting
- Goal: predator/squirrel monitoring — prioritize wide field of view (look for 110° or broader lenses) and lower mounting height
- Constraint check: Wi-Fi coverage, power or solar access, existing mounting surfaces, and wind exposure
Optimal height, distance, and angle for clear footage
For a bird feeder camera specifically (as opposed to a general wildlife camera trap aimed at ground-level mammals), the sweet spot for mounting height is 5 to 6 feet. This keeps the camera close enough to the typical perch area that you are not losing resolution, and it puts the feeding activity at a natural face-on angle rather than a steep top-down view that makes identification harder. General camera-trap guidance recommends about 20 inches off the ground for ground wildlife, but birds at a feeder sit elevated, so you work upward from there. To nail the best position for a bird feeder, match the camera distance, height, and angle to how the birds approach your perch.
For distance, keep the front of the lens 2 to 4 feet from the main feeding perch or tray. Camera-trap field research suggests at least 4 to 5 feet of clear open space in front of the camera to prevent flash reflection and ensure the subject is in the camera's sharpest focus zone. With a bird feeder, the 2 to 4 foot range hits that sweet spot: close enough for feather-level detail, far enough that birds are fully in frame rather than just a blur of wing.
Angle the camera slightly downward, roughly 10 to 20 degrees below horizontal. This does two things: it keeps the open sky out of the frame (which causes brutal backlighting), and it centers the feeding perch in the usable view. A completely level or upward-tilted camera will constantly fight glare and blown-out skies. The good news is that many smart camera feeders like the Birdfy lineup ship with rotatable brackets specifically so you can dial this angle in after mounting, which I strongly recommend doing before you call the install done.
| Placement Variable | Recommended Range | Why It Matters |
|---|---|---|
| Mounting height | 5 to 6 feet off ground | Aligns camera with elevated perch area; avoids top-down view that obscures markings |
| Distance from perch | 2 to 4 feet | Resolves feather detail for ID; stays within sharp focus zone |
| Camera tilt | 10 to 20° downward | Removes sky from frame, eliminates backlight, centers feeding zone |
| Clear space in front | At least 4 feet | Prevents flash reflection and foreground obstruction |
| Field of view | 90 to 110° wide-angle | Captures full feeder and nearby perches without distortion |
Lighting, glare, shadows, and the best time of day to record
Lighting is where most people make their biggest placement mistake, and it is almost always fixable without moving the whole feeder, just by rotating the camera direction. The core rule: the sun should be behind the camera, not behind the birds. In North America, that means a camera facing south, southeast, or southwest tends to have the sun illuminating the birds from behind the camera, while a camera facing north puts the sun directly in front of the lens and destroys the image. If your yard layout forces you to face north, shade the camera housing and rely on the 10 to 20 degree downward tilt to keep direct sky out of frame.
Time of day matters more than most people expect. Early morning light (roughly 7 to 10 a.m.) is soft, directional, and warm, and it also lines up with peak bird feeding activity, which makes it the single best window for footage quality. Midday sun produces harsh shadows and blows out white or pale plumage completely. Late afternoon gives you a second good window, especially in summer, but watch for long shadow striping if your camera faces east. If you are relying on AI species ID, morning hours in well-lit conditions will get you the most accurate reads.
Motion blur is a separate but related problem. Birds move constantly, and even a small wing flick at slow shutter speeds creates permanent blur that ruins species identification. Fast shutter speeds fix this, but most integrated camera feeders do not let you manually set shutter speed the way a DSLR would. What you can control is light: the brighter and more evenly lit the scene, the faster the camera's automatic shutter will be. This is another reason to prioritize direct (not diffused or shadowed) morning light rather than trying to shoot in shaded spots where the auto-exposure slows everything down.
Weatherproofing and background contrast for sharper images

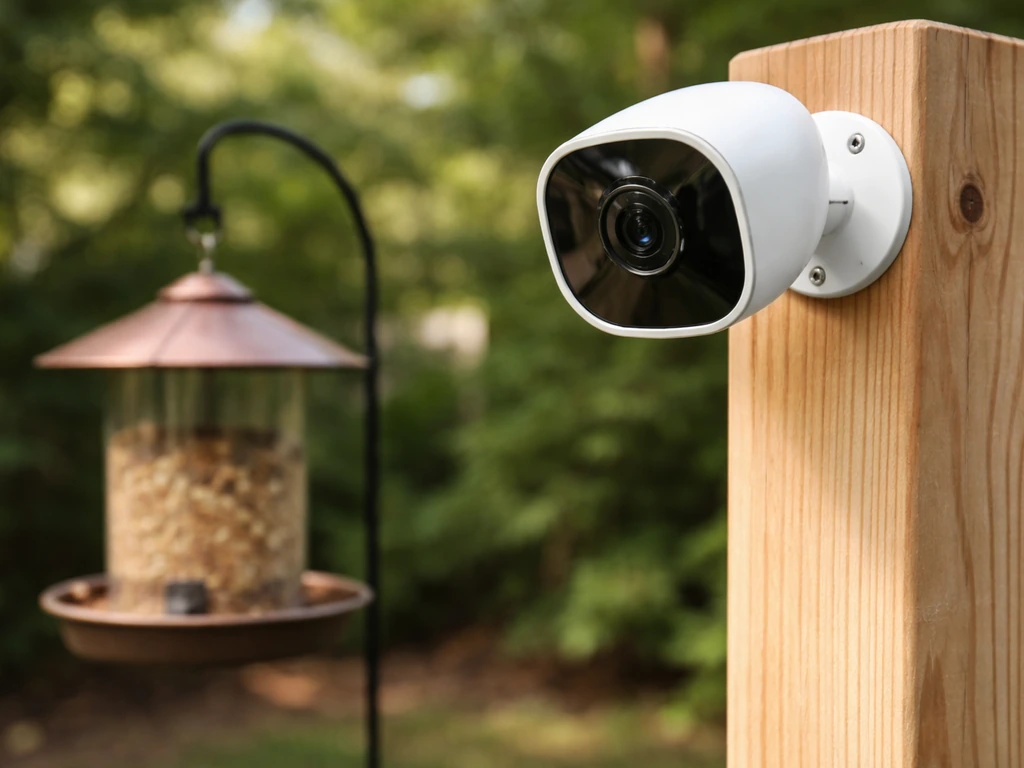
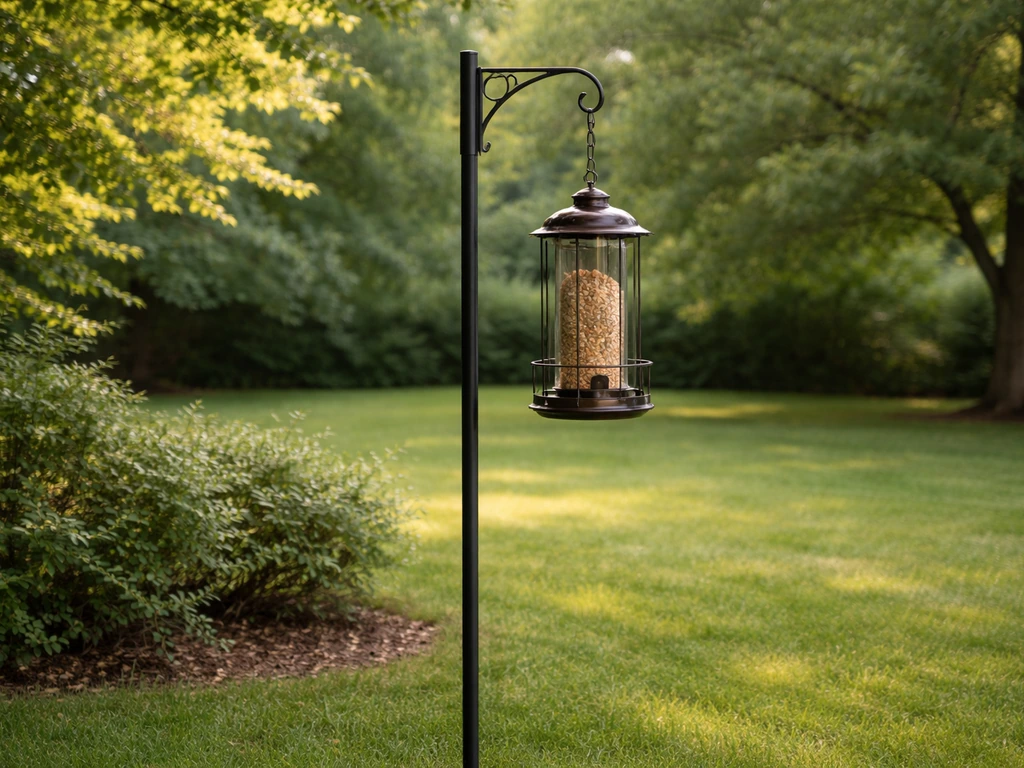
Most dedicated bird feeder cameras are built to handle weather. The Netvue Birdfy is IP65-rated, meaning it handles rain and dust without issue, and the Birdfy Feeder 2 series steps up to IP66, which adds protection against heavier water jets. The iCSee Q20 also carries an IP66 rating. For most North American climates, IP65 is genuinely sufficient for year-round outdoor use. What weatherproofing ratings do not protect against is wind movement, which is a bigger enemy of sharp footage than rain. A feeder swinging on a chain will produce motion-blurred video no matter how good the camera is. Mount on a solid pole or bracket, not a hanging hook, if video quality is your priority.
Background contrast is underrated and almost free to fix. If you place a feeder in front of open sky, a busy garden, or a wood pile with inconsistent tones, the birds blend in and the AI has a harder time separating subject from background. A solid dark green hedge, a plain fence board, or even a piece of dark burlap stretched behind the feeder gives the camera sensor a clean subject-to-background edge. When I moved one of my own feeders six feet to the left so the cedar fence was directly behind it instead of the open sky, the species detection accuracy improved noticeably, and the footage looked more professional with zero hardware change.
Overhang protection is worth planning for. Mounting the feeder under an eave, a deck overhang, or a purpose-built roof baffle keeps the lens dry during rain (rain on glass kills clarity instantly) and reduces direct overhead sun that causes top-down harsh shadows. It also naturally extends the life of the electronics even on IP65 or IP66 units, which are rated for survival in rain, not optimized for constant soaking.
Mounting options and how to keep squirrels out of your footage (and your seed)
How you mount the feeder camera determines both the footage stability and your squirrel situation. There are three main options, each with real trade-offs.
| Mount Type | Best For | Squirrel Risk | Footage Stability |
|---|---|---|---|
| Dedicated pole with baffle | Open yard with no nearby trees or fences | Lowest (baffle stops climbing) | Excellent (no sway) |
| Wall or fence mount | Small yards, deck setups, near the house | Low if no adjacent jumping points | Excellent (rigid surface) |
| Tree strap or trunk mount | Natural or wooded settings | High (squirrels climb trees) | Good if trunk is thick and stable |
| Hanging hook or chain | Temporary or rental setups | High (squirrels can reach from above) | Poor (wind causes sway and blur) |
A smooth metal pole with a torpedo-style or cone baffle is the gold standard for keeping squirrels out while maintaining stable, blur-free footage. Position the pole at least 10 feet away from any tree branch, fence, or roofline that a squirrel can leap from (they can jump surprisingly far horizontally). The Birdfy Feeder 2 Duo, for example, ships with wall-mounting hardware and a quick-release plate, so it works well fixed to a fence or post. The rotatable bracket makes it easy to fine-tune angle after the fact without removing the whole unit.
If squirrels are getting into frame and stealing seed on camera, treat it as a placement problem first before reaching for a baffle or cage solution. The most common mistake is mounting the feeder too close to a vertical surface the squirrel can cling to while feeding. Keep at least 18 inches of clear horizontal space on all sides between the feeder and any climbable surface.
Placement tips by species: finches, cardinals, woodpeckers, and hummingbirds
The birds you are targeting should influence your height and camera angle choices, because different species feed at different heights and approach from different directions.
Finches (goldfinches, house finches, purple finches)
Finches are comfortable feeding at 5 to 6 feet and will use tube feeders with multiple ports. Because they are small and quick, place the camera slightly closer to the feeder, around 2 feet, to get enough facial detail for reliable ID. They tend to land and cycle rapidly, so good lighting matters a lot here for avoiding motion blur. A nyjer or mixed seed tube feeder against a solid background gives the camera the best chance of capturing them clearly before they dart away.
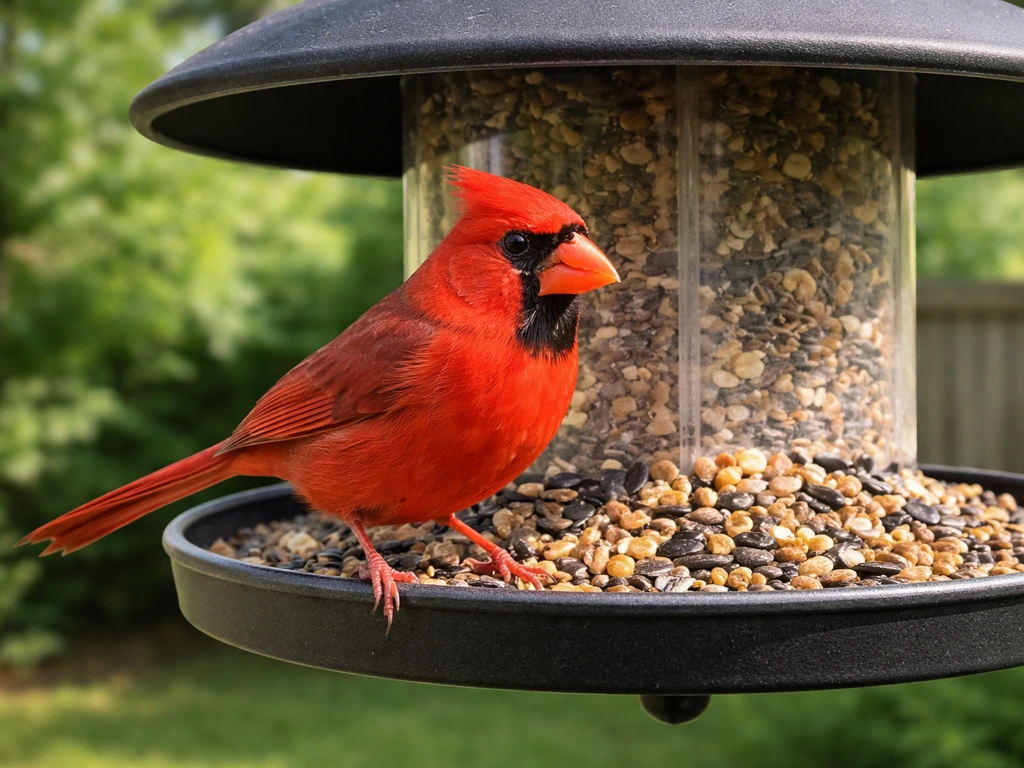
Cardinals
Cardinals are platform or hopper feeders at 4 to 5 feet off the ground and tend to approach from lower perches below the feeder before hopping up. Angle the camera slightly lower than you would for finches, and give a wider frame to catch that approach behavior. The male northern cardinal's red plumage looks stunning against dark green backgrounds, so if you have a hedge or dark fence nearby, use it. Cardinals are also skittish; place the feeder at least 8 to 10 feet from a window or high-traffic door to avoid constant flushing.
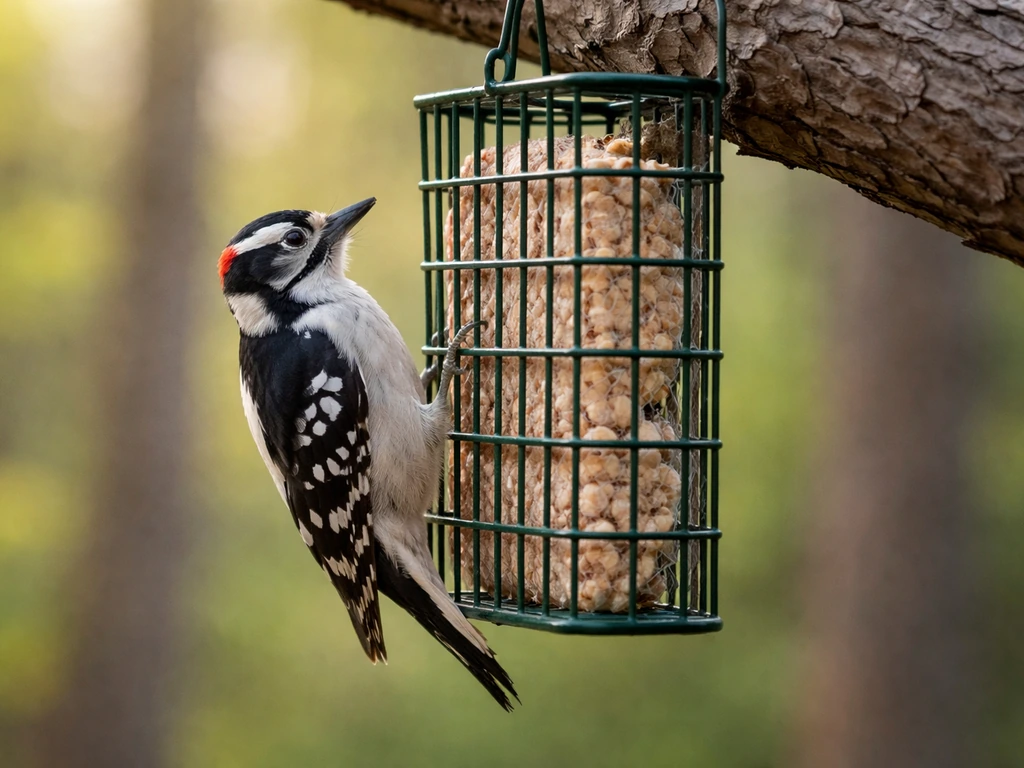
Woodpeckers
Woodpeckers (downy, hairy, red-bellied) prefer suet cage feeders and will cling vertically to the feeder itself. Mount the camera to the side of the feeder rather than directly in front if possible, because a woodpecker clinging to a suet cage presents its full body profile from the side, which is the best angle for species identification. Height of 5 to 7 feet works well. Larger pileated woodpeckers may approach lower; if you are in range for pileateds, mount the suet cage at 4 to 5 feet so the camera captures the full bird without cutting off the head.
Hummingbirds
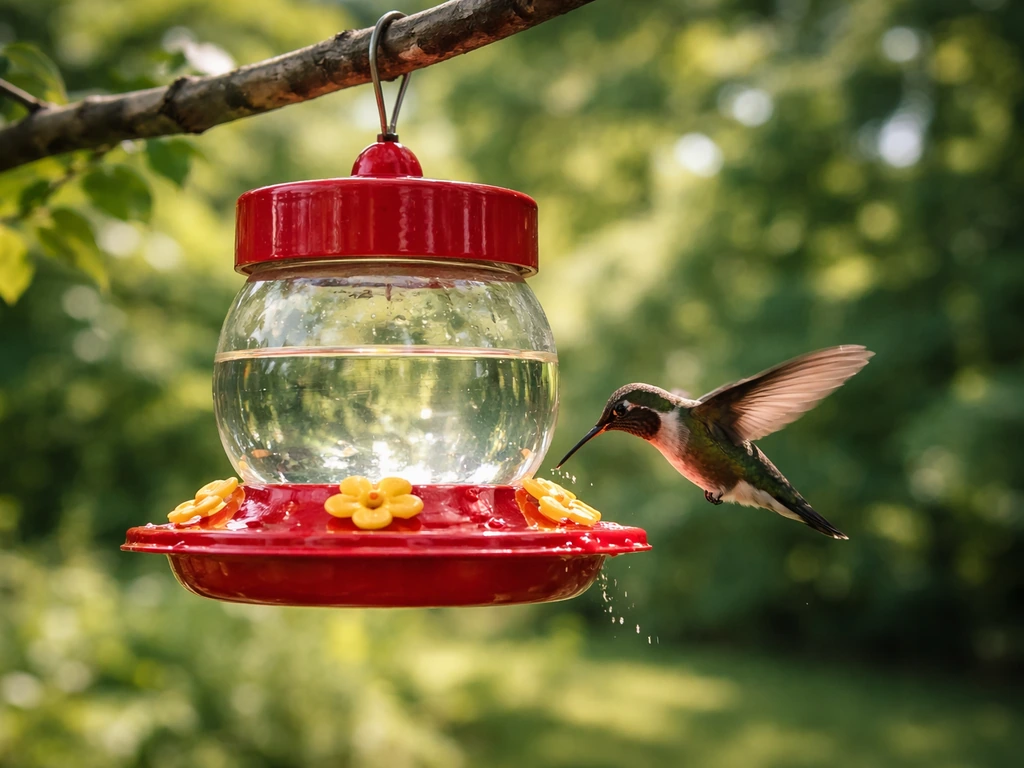
Hummingbirds are the hardest to capture on camera because they hover, dart, and move unpredictably at high speed. Mount a dedicated hummingbird nectar feeder at 4 to 5 feet and bring the camera as close as 18 to 24 inches from the feeding port if the lens allows it, since hovering birds do not perch long enough for zoom to compensate.
A dark background is especially important here because hummingbird iridescence only shows when the bird is lit from behind the camera. Morning light is critical with hummingbirds: the gorget color is almost invisible in flat or shadowed light and pops dramatically in direct morning sun. If you are in the western US targeting Anna's or Rufous hummingbirds, a south-facing placement captures more consistent sun throughout the day.
Test your placement and fine-tune it before calling it done
The best placement is the one you actually verify with footage, not the one that looks right from your kitchen window. Run through this checklist the day you install, then check again after the first morning recording session.
- Check live view before you leave the ladder: confirm the feeding perch is centered in frame and no branches or hardware are blocking it
- Verify the sky is not visible in the upper portion of the frame; if it is, tilt the camera down until the background is fence, foliage, or wall
- Record 10 minutes of live footage mid-morning and review for motion blur; if birds look smeared, find a brighter spot or move the feeder into more direct light
- Check the background in the footage, not just in the live view; camera sensors sometimes flatten contrast in ways your eye does not notice in person
- Test the mounting for sway: push the feeder and watch the live view; any movement that causes frame shake will produce blurred footage in wind
- Confirm the Wi-Fi connection holds at the chosen location by checking recorded clip sync in the app; if clips fail to upload, move the feeder 5 to 10 feet closer to the router or add a Wi-Fi extender
- After first full-day recording, check what time of day produced the sharpest clips and the most bird activity; those two windows should overlap, and if they do not, consider whether shifting the schedule or the feeder direction by 45 degrees would help
- If squirrels appear in footage, measure the horizontal distance from the feeder to the nearest climbable surface and increase it to at least 10 feet, or add a baffle to the pole
Most placements need at least one adjustment after the first recording session. That is completely normal. The rotatable brackets on most smart camera feeders exist precisely for this reason. Give yourself a week of footage before making any major changes, because bird activity at a new feeder location often takes 3 to 7 days to normalize as local birds discover the new spot and get comfortable approaching it. Once activity picks up and you have a solid baseline, small tweaks to angle, height, or background can make a dramatic difference in footage quality without touching the feeder's core position.
If you are also thinking about how high the feeder should sit independently of the camera, or how to set up your whole backyard feeder system for photography more broadly, those are worth considering alongside the camera-specific placement decisions here. If you want the full setup dialed in, review the best bird feeder setup for height, distance, and the right feeder type for the species you want. The camera adds constraints that general feeder placement guides do not account for, but the fundamentals of attracting birds, preventing squirrels, and choosing the right feeder type all apply the same way.
FAQ
Can I point the camera at a feeder that faces east or west if my yard layout forces it?
Yes, but expect lighting swings. Use the 10 to 20 degree downward tilt so open sky stays out of frame, and plan to test in your worst lighting hour (late morning for east, mid afternoon for west). If you see blown-out whites or glare on the lens, rotate the camera slightly until the sun is behind the camera housing, not behind the birds.
What if there is no north-facing wall or hedge for a dark background?
Create one with a stable, dark backing behind the birds, such as a dark fence board, tarp, or dark burlap attached to a rigid frame. Avoid bright reflective materials. The key is a uniform tone directly behind the feeding area so your subject-to-background edge is strong for both recording and AI identification.
How do I mount the camera feeder if I have limited straight space in front of it?
If you cannot keep the front of the lens 2 to 4 feet from the main feeding perch, prioritize sharpness over field-of-view. You can usually regain usable framing by choosing a stronger downward tilt (more open-sky avoidance) and using the feeder camera's adjustable bracket if available. If the subject repeatedly clips the frame or focuses on the background, you will likely need to relocate the mount rather than only retune the angle.
Will an overhang or roof baffle make the footage too dark for species ID?
It can, especially for AI identification, because darker scenes often trigger slower exposure and more motion blur. If you use an overhang, ensure the feeding area still receives early morning sun or evenly lit light, and confirm the shutter behavior indirectly by reviewing motion blur on wing tips. If images look soft or streaky, rotate to reduce shadowing rather than moving the entire feeder under cover.
Is 5 to 6 feet mounting height always ideal, or can it be changed for specific birds?
It is a strong default for many feeders, but species approach and perch height matter. For finches, the camera often works better a bit closer to the perch region (around 2 feet from the tray, not 10). For woodpeckers on suet cages, side-mounting and slightly higher or lower placement (about 4 to 7 feet depending on species) can matter more than chasing 5 to 6 feet exactly.
How far should the camera feeder be from windows or doors to avoid flushing birds?
A practical rule is to keep it at least 8 to 10 feet from windows or high-traffic doors, especially for skittish species like cardinals. If you cannot reach that distance, use the smallest viable movement area (avoid standing directly in line with the birds) and test whether the birds still approach normally during your best light window.
What should I do if squirrels are triggering the camera but birds are not approaching yet?
Treat it as a placement issue first. Increase clearance so the feeder is not adjacent to a climbable surface, aiming for at least 18 inches of horizontal space on all sides. Also check that the pole or bracket is rigid so the feeder does not swing, because wobble can attract squirrel behavior and degrade footage quality. Give it several days, since local birds often take 3 to 7 days to normalize after a new setup.
My camera shows up-to-date live view, but AI species detection is unreliable. What’s the most common cause?
Usually lighting and background contrast, not the internet connection. Confirm the sun is behind the camera, not behind the birds, and make sure the birds stand out against a dark, consistent background. Then review whether birds are consistently fully in frame at the perch, because partial subjects and blown-out plumage often lead to bad reads even when video streams fine.
Do I need to worry about wind more than rain for a bird feeder camera?
Yes. Wind-related movement is often worse than rain for footage clarity. A feeder hanging on a chain or a loose bracket will sway and cause motion blur even if the camera is weather-rated. Use a solid mount, tighten hardware, and recheck stability after windy days, since looseness can develop over time.
How should I test placement to avoid wasting time troubleshooting later?
Do a structured check on the day you mount it: verify sun direction in the time window you care about, confirm the birds are centered and fully in frame, and check for lens glare by reviewing the first short recording segment. After the first morning session, expect at least one fine adjustment, and do not make major moves until you have a few days of footage to establish a baseline.
Can I use a general wildlife camera trap setup for a bird feeder?
It is possible, but bird feeders have different subject behavior than ground mammals. Bird feeder footage often needs perch-facing angles, higher mounting that matches feeder height, and a controlled background behind the feeding area. If you go with a wildlife-trap approach, you may still need camera distance and angle tuned to bird-level approach rather than top-down detection.
What’s a quick way to decide between “rotate the camera” versus “move the whole feeder” after my first review?
Rotate the camera first when the issue is glare, blown skies, or birds partially framed. Move the whole feeder when the problem is background mismatch, inconsistent in-frame positioning at the perch, or repeated focus on non-bird areas. If you see recurring blur tied to feeder wobble, fix mounting rigidity before changing location.
Next Articles
Best Height for Bird Feeders: Exact Ranges by Feeder Type
Find exact feeder mounting heights by type and bird, plus placement tips to deter squirrels and grackles safely.
Best Bird Feeder for Red Birds: Top Picks and Setup Guide
Top feeders and setup tips to attract cardinals and other red birds using the right seed, mounts, and squirrel-proofing.

What Color Bird Feeder Attracts Birds Most: Quick Guide
Discover which bird feeder color draws the most birds, plus setup tips for durability, placement, and reducing squirrels