The best bird feeder for photography is a platform or tray feeder for most species, a dedicated nyjer sock or mesh tube for finches, a suet cage for woodpeckers, and a clean nectar feeder for hummingbirds. Feeder type alone isn't the whole story though: placement, height, background control, and how you integrate your camera all determine whether you walk away with a card full of keepers or a folder of blurred, poorly framed misses. I've tested setups across a range of budgets and species targets, and this guide pulls together what actually works.
Best Bird Feeder for Photography: Top Picks & Setup Guide
Marcus Holloway
13 Jul 2026
Who this guide is for
If you're a backyard birdwatcher who has started wondering why your bird photos always look like blurry passport shots, or a photographer who just wants to build a reliable feeder station that gives you repeatable, frame-filling opportunities, this is for you. The advice here works for everyone from casual phone shooters to serious DSLR or mirrorless users running 400mm-plus glass. I'll cover feeder types, species-specific setups, recommended heights, camera-to-feeder distances, and some of the smart feeder camera options worth looking at in 2026.
How feeder choice changes what you can photograph
Feeder design shapes almost everything: which species show up, how long they stay, what postures they hold, and whether your lens actually has a clear sightline to the bird. A tube feeder crammed with sunflower seeds will draw chickadees and house finches all day, but the perch ports face every direction and birds tend to rotate unpredictably, making consistent framing hard. A wide platform feeder, on the other hand, gives you birds feeding in open, side-on poses with no hardware blocking the view. Suet cages pin woodpeckers to a vertical plane at a known location, which is ideal for portrait shots. Nectar feeders bring hummingbirds to a tight, predictable hover point you can pre-focus on.
The species-feeder link matters as much as design. Tube and nyjer feeders pull in small seed-eaters like goldfinches, pine siskins, and redpolls. Platform and hopper feeders attract larger-bodied birds including cardinals, blue jays, and unfortunately grackles. Suet feeders are almost uniquely effective for woodpeckers, nuthatches, and chickadees. Knowing this lets you build a targeted station rather than a general-purpose one that draws everything and gives you clean shots of nothing.
Behavior matters too. Titmice and chickadees typically grab a seed and immediately fly to a nearby branch to crack it open, which creates a reliable perch opportunity separate from the feeder itself. Cardinals tend to linger on wide trays or hopper ledges in relaxed, photogenic poses. Woodpeckers cling and work methodically. Understanding these habits lets you anticipate where to aim before the bird even arrives.
What to look for in a photo-friendly feeder
Not every feeder is built with your camera in mind. These are the criteria that actually affect image quality and usable frame rate, based on my own testing and standard field methodology adapted from structured feeder observation protocols. blank" rel="noopener noreferrer">Project FeederWatch (Cornell Lab of Ornithology) standard observation methodology uses repeated two‑day count periods (early Nov–late Apr), records the maximum number of each species seen during each period, and logs observer effort, providing a replicable feeder‑monitoring protocol. blank" rel="noopener noreferrer">Photo‑friendly feeder design criteria include unobstructed sightlines, stable side‑on perches sized for target species, predictable approach paths, and easy cleaning, factors that increase usable image rates and consistent composition.
Visibility and unobstructed sightlines
The single biggest photo killer is hardware in front of the bird. Thick plastic seed ports, cage bars, or overhanging roofs constantly clip wings, heads, and tails. Look for feeders with minimal framing around perch areas, or open tray designs where birds feed on a flat surface with nothing between them and your lens.
Perch design and orientation
Perches that face a fixed direction are your best friend. A platform feeder or a suet cage mounted to a pole gives you a known perch orientation you can pre-aim at. Tube feeders with perches that wrap 360 degrees around the feeder are a nightmare for consistent composition. If you're using a tube feeder, try blocking the ports on the camera-facing side so birds are forced to the side you can actually photograph.
Stability
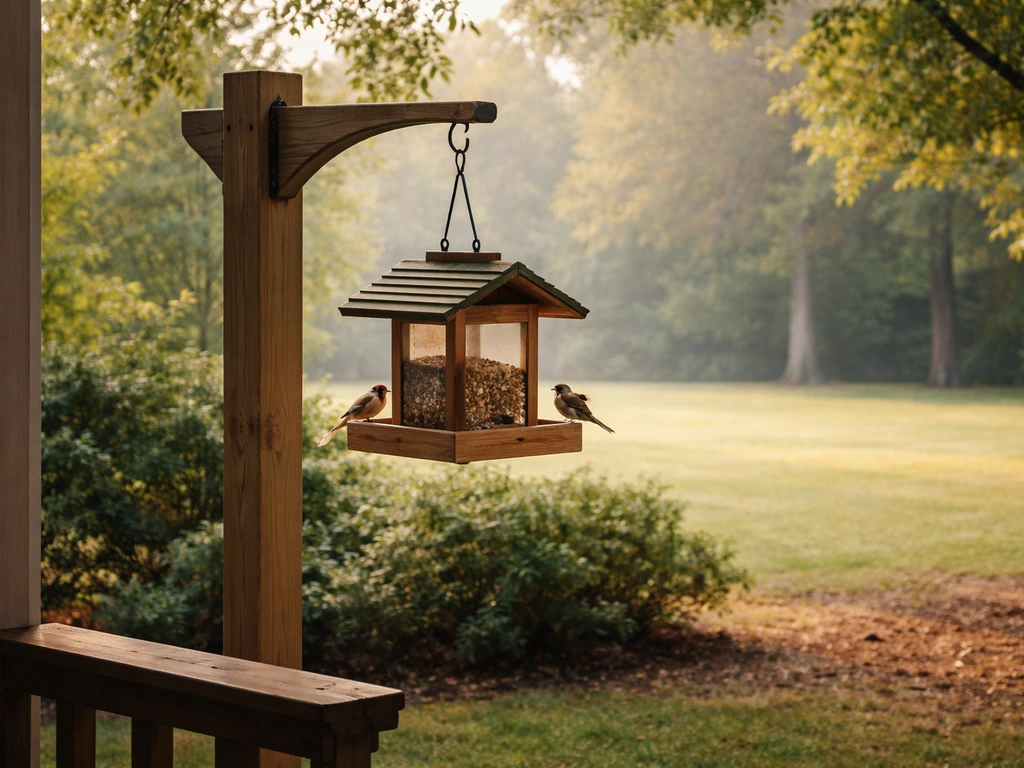
A feeder that swings in light wind will motion-blur every shot at the moment a bird lands. Pole-mounted feeders outperform hanging feeders for this reason. If you must hang a feeder, use the shortest possible drop and consider a stabilizer hook or baffle that reduces swing. I've lost dozens of otherwise clean frames to a feeder pendulumming at a critical moment.
Materials and durability
Metal and powder-coated steel components outlast bare plastic, especially in direct sun. UV-degraded plastic cracks, goes cloudy, and often leaves sharp edges that can injure birds. For the seed reservoir itself, clear acrylic or UV-stable polycarbonate is fine provided it stays transparent, which matters for feeders where you want to see seed levels without disturbing the birds. Avoid shiny chrome hardware near the feeding surface: it creates hot spots and lens flare in your shots.
Ease of cleaning and maintenance
A dirty feeder drives birds away. Feeders with removable trays, wide-mouth tubes, and dishwasher-safe components get cleaned more often, which means more consistent bird traffic and better photo sessions. The Aspects Quick-Clean Nyjer design, for example, disassembles in seconds, which is why it remains popular despite being a simple product.
Squirrel and large-bird resistance
Squirrels and grackles don't just eat your seed, they monopolize the feeder and eliminate the photo opportunities you were trying to create. Weight-activated feeders like the Brome Squirrel Buster Plus close off ports when a squirrel climbs on, and the Droll Yankees Yankee Flipper spins intruders off. Both reduce non-target traffic significantly. For grackle control, shorter perches and tube feeders with small ports exclude the larger birds while still accommodating cardinals and smaller species.
Feeder types compared: photo pros and cons
| Feeder Type | Best Species for Photos | Photo Pros | Photo Cons | Recommended Use |
|---|---|---|---|---|
| Platform / tray | Cardinals, jays, doves, sparrows | Open sightlines, natural poses, minimal hardware obstruction, easy background control | Exposed seed spoils fast; attracts grackles and squirrels; no selectivity | Primary photo station for large, photogenic species |
| Tube (sunflower/mixed) | Chickadees, finches, nuthatches | Compact footprint, easy to pole-mount at ideal height | Ports face all directions; thick plastic can block bird faces | General-purpose station; block back ports to direct birds toward camera |
| Hopper / house | Cardinals, grosbeaks, jays | Wide perch ledges, stable, holds large seed volumes | Roof overhangs cast shadows; bulk hardware can clutter frame | Good for cardinals when placed in open with clean background |
| Suet cage | Woodpeckers, nuthatches, chickadees | Pins birds to vertical plane; repeatable portrait position; clinging posture is highly photogenic | Wire cage visible in frame if shot at wrong angle | Essential for woodpecker shots; mount at eye level when possible |
| Nectar / hummingbird | Hummingbirds | Predictable hover point; birds approach from consistent angles | Reflective plastic can blow out highlights; tiny subject needs fast shutter | Hummingbird-dedicated station 15-20 ft from windows |
| Nyjer / finch mesh | Goldfinches, siskins, redpolls | Long relaxed perching sessions; many birds at once | Mesh pattern visible if too close; seed dust coats nearby surfaces | Best for volume finch shots; pair with natural perch stick nearby |
| Specialty (cardinal ring, woodpecker log) | Species-specific | Natural material integration (logs, branches) looks great in frame | Limited seed capacity; must be refilled/re-drilled frequently | Accent feeder for variety; excellent for natural-look composition |
Species-specific feeder picks and placement
American Goldfinch and other finches
Goldfinches, pine siskins, and common redpolls are easiest to photograph at nyjer feeders or mesh socks. They perch for long, relaxed sessions and tolerate a close camera more than most species. Mount the feeder 5 to 8 ft high on a pole in a moderately open area within 10 ft of shrubs or a tree edge, which encourages confident, unhurried feeding. Adding a short natural branch just below or beside the feeder gives you a clean secondary perch for single-bird portraits without feeder hardware in the background. Aspects Quick-Clean Nyjer or any stainless mesh sock design works well here.
Northern Cardinal
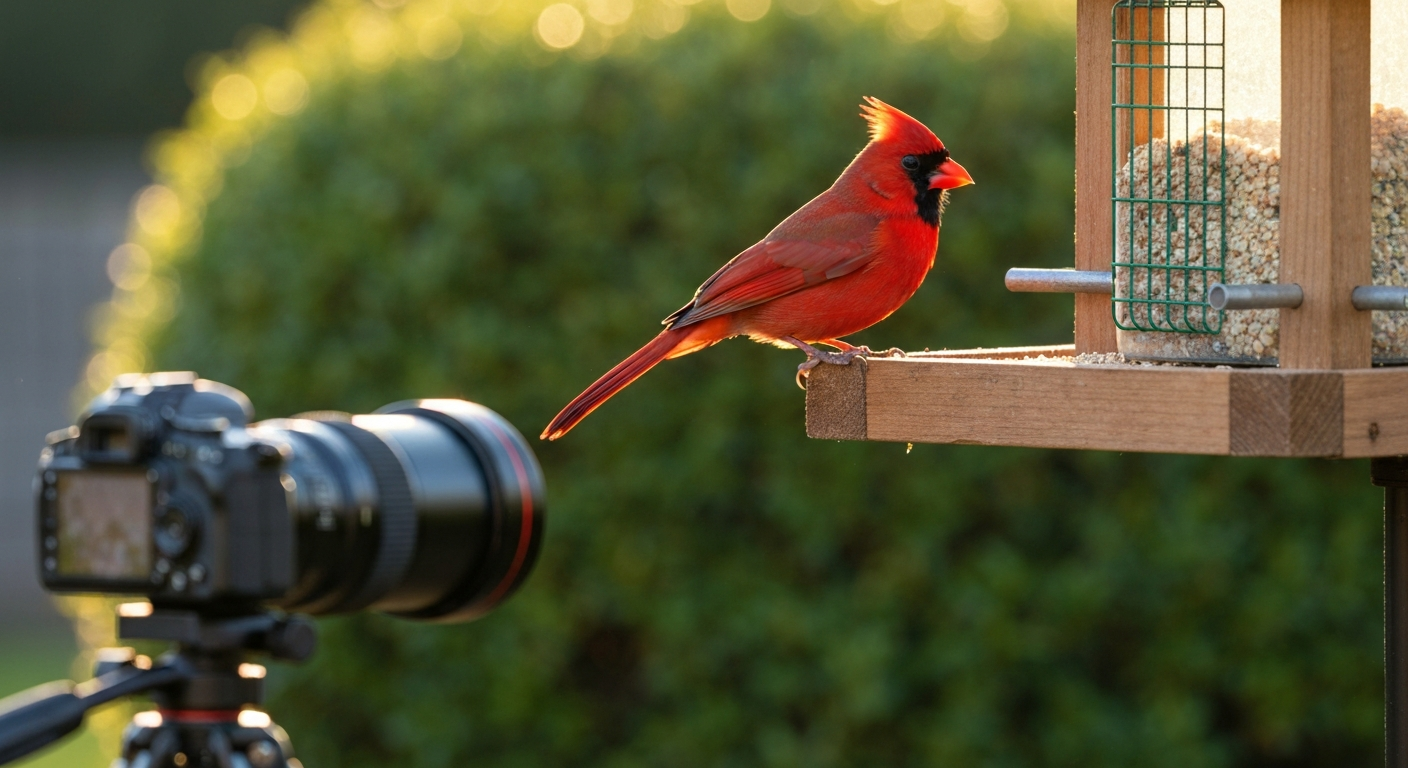
Cardinals prefer wide, stable perches and dislike cramped feeding stations. A hopper feeder with broad ledges or an open platform tray at 4 to 6 ft high is ideal. They feed in relaxed, upright postures that look great in photos. Position the feeder so morning light hits the feeding face (cardinals are most active in early morning and late afternoon), and keep a clean, neutral background (a green shrub 6 to 10 ft behind the feeder works well). Male cardinals against a blurred green background is one of the most reliably pleasing shots in backyard bird photography.
Downy, Hairy, and Red-bellied Woodpeckers
Suet feeders mounted on a pole or attached to the side of a tree trunk are the go-to setup. The woodpecker's clinging posture on a vertical surface gives you a clean side-profile opportunity that no other feeder type replicates. Mount suet cages at 5 to 8 ft, ideally at a height that puts the bird at or just above your eye level when you're seated or shooting from ground level. A tail-prop suet feeder (one with a lower extension for the tail) positions woodpeckers in their most natural, full-body-visible stance.
Ruby-throated Hummingbird
Hummingbirds need clean nectar (plain 4:1 water-to-sugar ratio, no red dye) changed every 2 to 3 days in warm weather. Place the feeder in partial shade to prevent fermentation and to reduce harsh reflections on the plastic or glass tube. A height of 5 to 6 ft is practical and comfortable to photograph. Keep it at least 15 to 20 ft from windows to reduce collision risk. Because hummingbirds are so small and move so fast, you want a feeder with a single feeding port or a very clean front face, something you can pre-focus on and wait at. A spare red flower (real or silk) placed a few inches from the port gives the bird something to perch on briefly and adds context to the image.
Chickadees, Titmice, and Small Songbirds
These are great subjects for the photographic technique of setting up a natural perch near the feeder rather than photographing at the feeder itself. Chickadees and titmice routinely grab a seed and carry it to a nearby branch, which means you can set a photogenic branch or mossy log 3 to 5 ft from the feeder and watch birds land there in clean, isolated compositions. Mount the main tube or hopper feeder at 4 to 5 ft and position your prepared perch at the same height, slightly closer to your camera position.
Best feeder heights by species and site conditions
Height affects both which species use a feeder and the shooting angle you end up with. Most species have a comfort range, but your camera setup also constrains how high you can practically go before you're shooting up at awkward angles or losing background control. These are the ranges that work both for the birds and for photography.
| Species / Feeder Type | Recommended Height | Photography Notes |
|---|---|---|
| Nyjer / finch tube | 5–8 ft | Keep at chest or eye level for level-plane shots; higher loses clean background |
| General tube (sunflower/mixed) | 4–6 ft | 4.5–5 ft is ideal for eye-level shooting from a chair or ground blind |
| Platform / tray | 4–5 ft | Lower = more natural feeding posture visible; easier to control background |
| Hopper (cardinal, grosbeak) | 4–6 ft | Cardinals prefer ~5 ft; height also reduces ground predator pressure |
| Suet cage (woodpeckers) | 5–8 ft | Match to tree-trunk height or slightly above eye level for clinging portraits |
| Nectar / hummingbird | 5–6 ft | 15–20 ft from windows; partial shade reduces glare in images |
| Near-cover placement (any type) | 4–6 ft within 10 ft of shrubs | Increases species use and reduces approach hesitation; good for shy species |
One thing I've learned: the right height isn't just about the bird's preference. If you're shooting from a seated position or a low blind, a feeder at 4.5 to 5 ft puts the bird at close to your lens axis, which gives you a natural eye-level perspective. That eye contact, bird looking roughly toward the camera rather than down at you or up away from you, is what separates compelling portraits from documentary record shots. The related topic of feeder height across different site conditions goes deeper on this if you want to explore the full range of scenarios. For specific mounting recommendations by species and site, see the guide to the best height for bird feeders.
Best position and placement when you're shooting with a camera
Feeder placement for photography adds a layer of deliberate design on top of standard bird-friendly placement advice. You're not just asking where birds will go, you're also asking where the light will fall, what will be behind the bird, and how your lens will physically get there.
Sightlines and camera access
Place feeders so you can approach your camera position without crossing the bird's line of sight to the feeder. A feeder on the far side of a garden bed with a mown path behind it for your tripod works much better than one in the middle of an open lawn where your movement is visible from every angle. The bird should see nothing but familiar background in your direction.
Light direction
Early morning light from the east is the standard for good reason: warm, low, directional light that wraps around a bird rather than flattening it. Face your feeder south or southeast so the feeding surface catches this light, and position yourself with the light broadly over your shoulder. A feeder in full shade all morning will give you flat, underexposed images or force high ISO values that introduce noise. Partial shade is acceptable for hummingbirds and in very hot climates, but for most feeder photography you want at least two to three hours of direct morning sun on the feeder.
Background control
A clean, out-of-focus background transforms a snapshot into a proper photo. The ideal background is a dense green shrub, a dark conifer, or a shaded lawn 6 to 15 ft behind the feeder. Avoid placing feeders in front of fences, light-colored walls, or busy garden structures that stay in focus and compete with the bird. The farther the background is from the feeder, the more your lens will blur it (at f/5.6 to f/8 on a 400mm lens, a background 10 ft behind the bird will be visibly soft). Thinking about this before you drive the pole in saves a lot of frustration later.
Distance from windows
The standard feeder-placement guidance splits into two distinct strategies for photography. Either place the feeder within 3 ft of a large picture window so birds approaching at slow speed can't build up enough velocity to injure themselves on the glass (this is the window-mount and ultra-close shooting strategy), or position it 10 or more feet from the nearest window with clear open space around it for a more traditional tripod or hide setup. Both work, but they call for different camera rigs. The best place to put a bird feeder with camera access is a separate topic worth reading through if you're designing a dedicated photo station.
Camera setup and workflow at the feeder
Window mounts
A clear acrylic window-mount tray feeder is one of the best tools available for photographers who don't have outdoor access or want to shoot in bad weather. You shoot through the glass (clean it inside and out, and open the window if possible for maximum sharpness), rest your lens on a beanbag on the sill or use a window-mount tripod head, and have birds at literally 1 to 3 ft. At these distances even a 200mm lens fills the frame with a chickadee. The working distance is so short that depth of field becomes very shallow, so you'll want to close down to f/5.6 to f/8 to keep the whole bird sharp.
Tripod setups and garden hides
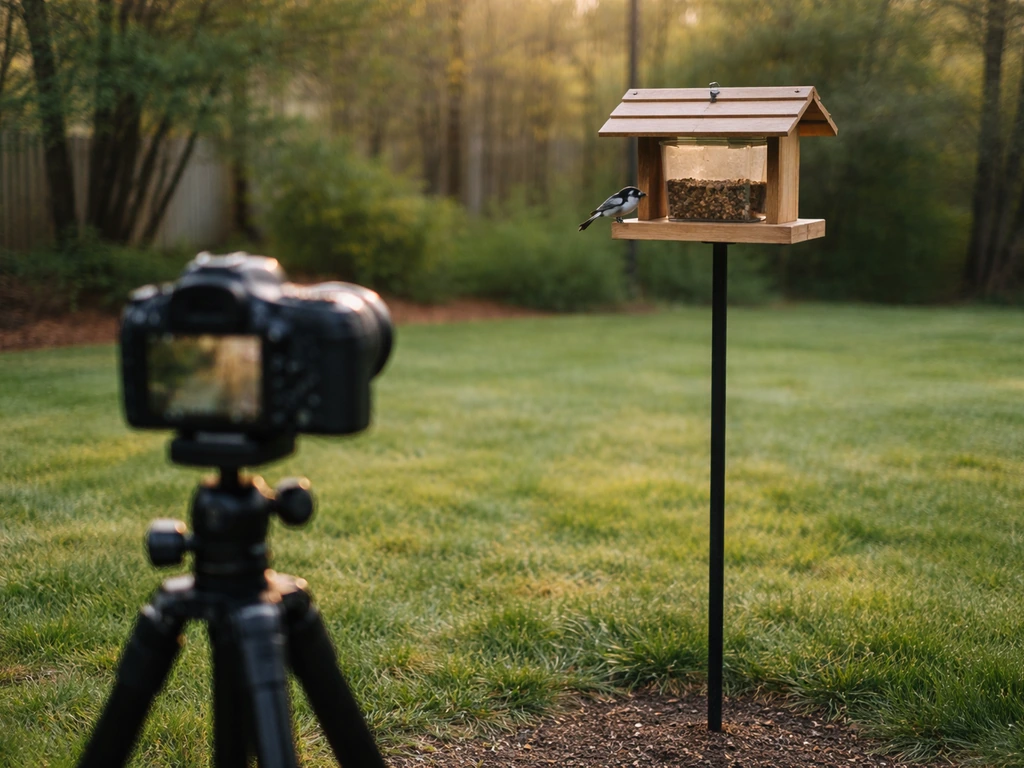
For outdoor setups, a tripod with a fluid or ball head positioned 10 to 20 ft from the feeder gives you the stability needed for sharp images at 400mm to 600mm. Birds habituate to a static tripod within a day or two, especially if you leave it in place between sessions. A pop-up hide (portable fabric blind) accelerates this habituation and lets you get within 8 to 12 ft with no bird disturbance at all. I use a simple dome-style blind about 10 ft from my platform feeder and the birds are completely indifferent to it after the first morning.
Remote triggers and hands-off capture
A camera on a tripod with a wireless remote trigger or an electronic cable release lets you pre-focus on the feeder perch, step back entirely, and fire without any body movement to spook the birds. This works especially well for shy species like thrushes or waxwings that occasionally visit platform feeders. You can sit 15 to 20 ft away, watch through binoculars, and fire when the bird is in position. Motion-activated triggers (infrared break-beam or PIR sensor systems) take this further by firing the camera automatically, though framing has to be locked in advance.
Focal lengths and working distances
The practical sweet spot for outdoor feeder photography is 400 to 600mm on a full-frame body. At 600mm you can fill the frame with a small songbird from roughly 10 to 15 ft, which is a comfortable distance that doesn't disturb most species. At 400mm you need to be at 6 to 10 ft for the same framing, which is workable from a hide. If you're shooting on an APS-C or crop sensor body, a 300 to 400mm lens gives you a 450 to 600mm full-frame equivalent due to the 1.5x crop factor, which reduces the physical distance you need to maintain for the same composition. Adding a 1.4x extender to a 400mm lens on a crop body gets you to an effective 840mm equivalent, enough for shy species from a non-disturbing distance.
| Setup | Effective Focal Length | Comfortable Working Distance | Best For |
|---|---|---|---|
| 300mm on APS-C crop body | ~450mm equivalent | 8–12 ft | Platform and tube feeders; window setups |
| 400mm on full-frame | 400mm | 10–15 ft | General backyard feeders; hides |
| 400mm + 1.4x on APS-C | ~840mm equivalent | 15–25 ft | Shy species; open platform setups |
| 600mm on full-frame | 600mm | 10–15 ft | Best all-around for feeder portraits |
| 200mm on full-frame (window mount) | 200mm | 3–6 ft | Window-mount feeders only; close-up detail shots |
Smart and camera-integrated feeders
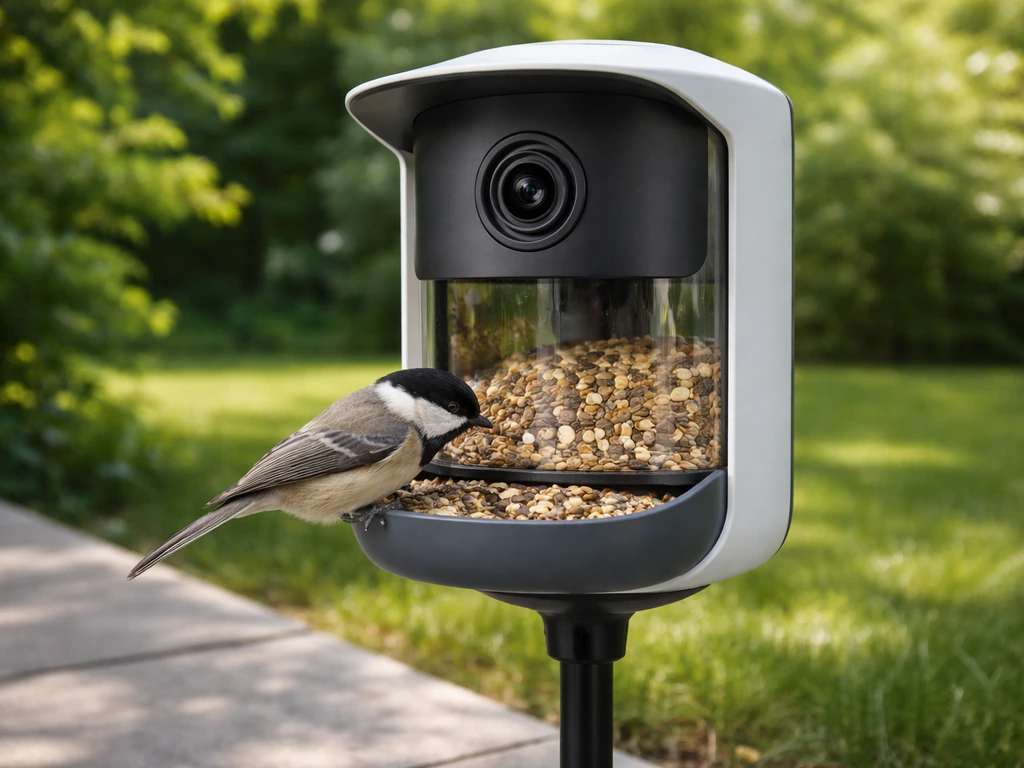
Smart feeders with onboard cameras (Birdfy, Bird Buddy, Netvue) have improved substantially and are worth considering for automated capture, species ID, and remote monitoring. The Birdfy 4K model offers genuine 4K video and some AI species recognition, with motion-triggered stills that capture birds you'd otherwise miss. Bird Buddy has a strong community app integration and reasonable image quality for a device that costs a fraction of a dedicated camera setup. That said, every smart feeder I've tested trades off something: the Birdfy 4K earns praise for detail and its squirrel-deterrent features, but reviewers note that dynamic range in backlit or high-contrast scenes falls short of even a modest mirrorless camera. These are best thought of as supplemental capture devices or monitoring tools rather than replacements for a camera-and-lens setup if image quality is your priority.
Managing squirrels, grackles, and other photo disruptors
Squirrels don't just eat your seed budget, they sit on feeders for extended periods and monopolize the perch your target species should be on. The Brome Squirrel Buster Plus uses a weight-activated shroud that closes seed ports when anything heavier than a medium-sized bird lands: it works reliably and doesn't harm squirrels. The Droll Yankees Yankee Flipper takes a more aggressive approach (a motorized perch ring that spins when a squirrel's weight triggers it), which is effective but requires batteries. Either of these on your primary feeder keeps the perch clear for the species you actually want to photograph.
Grackles are trickier. They are heavy enough to trigger weight-activated feeders, which helps, but they also displace smaller birds through sheer bulk and aggression. Switching from a platform or hopper feeder to a short-perch tube feeder during grackle season limits their access while still accommodating cardinals and most medium songbirds. Caged feeders, where the seed ports sit inside a wider wire cage, exclude grackles and starlings entirely while allowing chickadees, finches, and nuthatches through the gaps. They're not pretty in photographs, but keeping a caged feeder as your non-photography station while protecting your photo-friendly platform feeder with a weight-activated mechanism is a practical compromise.
A practical buying checklist
Before you spend anything, work through these questions. They're based on the criteria above and will help you avoid buying the wrong feeder for your specific setup and target species.
- Which species do you most want to photograph? (This determines feeder type first.)
- What camera and focal length will you be using? (This determines required working distance and whether a window mount or outdoor setup makes more sense.)
- Where is your best available light? (South or southeast-facing placement, morning sun on the feeder.)
- What is 6 to 15 ft behind your intended feeder position? (Identify your background before placing the pole.)
- Do you have squirrel pressure? (If yes, budget for a Squirrel Buster Plus or equivalent weight-activated feeder.)
- Will you be shooting from a hide, a window, or an open tripod position? (This affects feeder height and stability requirements.)
- What is your maintenance commitment? (Complicated feeders don't get cleaned; dirty feeders lose birds.)
- Are you interested in automated/smart capture as a supplement? (If yes, evaluate Birdfy or Bird Buddy for secondary capture alongside your primary camera.)
Recommended models by use case
| Use Case | Recommended Feeder / Product | Approx. Price (2026) | Key Photography Benefit |
|---|---|---|---|
| General platform for cardinals and large songbirds | Erva or similar powder-coated steel platform tray on pole | $30–$60 | Unobstructed 360-degree sightlines; stable |
| Finch photography (goldfinch, siskin) | Aspects Quick-Clean Nyjer mesh tube | $20–$35 | Long perching sessions; easy cleaning keeps birds returning |
| Squirrel-resistant tube (chickadees, finches) | Brome Squirrel Buster Plus | $55–$75 | Reduces non-target traffic; keeps perch available for target species |
| Woodpecker suet setup | Woodlink or Heath tail-prop suet cage on pole mount | $15–$30 | Vertical clinging posture; predictable portrait orientation |
| Hummingbird photography | Aspects High View or Perky-Pet glass nectar feeder | $20–$45 | Single port or clean face; no red dye contamination of images |
| Window-mount close-up shooting | Nature's Hangout or Woodlink acrylic window feeder | $25–$45 | Working distance under 5 ft; compatible with beanbag/tripod on sill |
| Smart/automated capture (supplemental) | Birdfy 4K or Bird Buddy (2nd gen) | $150–$250 | Motion-triggered stills/video; AI species ID; remote monitoring |
| Grackle-resistant (chickadees, titmice) | Droll Yankees or Aspects caged tube feeder | $40–$65 | Excludes large birds; keeps photo station focused on target species |
Putting it all together
The best photography feeder setup I've run is not a single feeder at all: it's a platform tray for cardinals and sparrows at 4.5 ft, a nyjer mesh tube for finches at 6 ft about 4 ft to the right of it, and a suet cage mounted to a nearby tree at 5.5 ft, all within about 12 ft of a pop-up hide. The background behind all three is a dense spruce hedge about 10 ft back. Morning light hits the feeding surfaces from the east. My 500mm lens on a crop body gives me close to 750mm equivalent from inside the hide at about 12 ft, which is enough to fill the frame with a cardinal or a goldfinch. Birds habituated to the setup within three days.
For anyone working from a window, a good acrylic tray feeder affixed to your largest south-facing window, combined with a beanbag on the sill and a 200 to 300mm lens, can produce genuinely excellent images without ever going outside. The bird feeder setup for photography topic on this site goes deeper on how to configure a multi-feeder station for maximum species variety and photographic yield, including how natural perch placement and background planting work together. For a quick product-focused roundup, see our best photo bird feeder guide. For a step-by-step configuration guide, see the best bird feeder setup. If you're still working out the basics of where to position everything, the best position for a bird feeder article walks through orientation and siting step by step. For step-by-step guidance on orientation and siting, see the best position for a bird feeder.
The core principle throughout is this: every decision you make about your feeder, from the type you choose to the height you mount it at to the background you place it against, either adds or subtracts from the images you can get. None of it is complicated once you frame it that way. Pick the feeder that fits your target species, mount it at the right height for your shooting position, control the background, and give the setup a few days to settle in. The birds will come.
FAQ
What feeder types produce the most photographable bird images and why?
Choose feeder types that match the species and shooting style. Platform and hopper feeders give open, side-on views for larger songbirds (cardinals, jays) and provide clear sightlines. Tube and nyjer/finch feeders attract small clinging species (finches, siskins) that hold still and offer long perching sessions—good for tight portraits. Suet and vertical trunk feeders are best for woodpeckers and nuthatches because those birds cling to vertical surfaces, yielding classic profile shots. Nectar/hummingbird feeders force predictable hovering and perching behavior for action and portrait images. The key photo-friendly traits are unobstructed sightlines, stable perches sized for the target species, and predictable approach paths.
What are evidence-based buying criteria for a photo-friendly feeder?
Prioritize: unobstructed sightlines (minimal ports/overhangs in front of where birds sit), perch design and size matched to target species, stable mounting (no wobble), weather- and UV-resistant materials for consistent appearance, easy cleaning access to maintain bird health and clear optics for close shots, predator/squirrel resistance to reduce disruptions, and modular/add-on compatibility (perch extensions, baffles). If integrating a camera, evaluate field of view, resolution, exposure control, frame rate, latency, and power/connectivity options.
How high and where should I place feeders for the best photo opportunities by species?
General practical height ranges used by backyard practitioners: nyjer/finch feeders 5–8 ft; tube/hopper feeders 4–6 ft; suet feeders 5–8 ft or attached to trunks; hummingbird feeders ~5–6 ft but keep them 15–20 ft from windows to reduce collisions. Place feeders within ~3 ft of large picture windows or attach window feeders for very close, stable shooting. For safer flight paths and better background separation, place feeders roughly 10+ ft from dense cover but within ~10 ft of some shrub/tree cover to let birds dart to shelter—this encourages use while reducing collision risk and allows predictable perch use.
How do I choose feeder placement for best camera integration (window mounts, tripod, hides)?
For the closest working distance and minimal optics, use clear acrylic window trays or window-mounted feeders that let you rest a beanbag or tripod head against the glass. If shooting from outdoors, mount feeders 10–20 ft from a hide/blind or tripod location so a 300–600mm lens fills the frame depending on sensor/crop factor. Ensure straight or slightly angled sightlines from camera to perching zone, position the camera lower than the feeder for more flattering light, and maintain an unobstructed foreground and background. Hides should be downwind of feeders when possible, and use small openings aligned to the feeder’s common perches to control approach angles.
What are recommended camera distances and focal lengths for backyard feeder photography?
Practical guidance: a 400–600mm full-frame lens is the sweet spot—600mm lets you fill the frame on small songbirds from ~10–15 ft (3–4 m); 300–400mm requires closer feeders or window setups. Crop-sensor bodies (1.5x) effectively increase reach (e.g., 300mm becomes ~450mm). Adjust distance so birds are on an axis that yields side profiles or three-quarter views; keep working distances consistent to simplify autofocus and exposure.
How should I control backgrounds and lighting for better images?
Place feeders so the background is at least several meters behind the perch; more background distance creates stronger subject separation (shallower apparent depth of field). Use simple, non-distracting backgrounds—evergreen massing or out-of-focus foliage works well. For lighting, prefer side or slightly back/side lighting in morning/late afternoon (golden hours) to produce texture and catchlights. Avoid shooting toward a bright sky; use fill flash sparingly and only when ethical (low power to avoid startling). Position feeder-camera axis to get the sun behind the photographer or to the side for three-dimensionality.