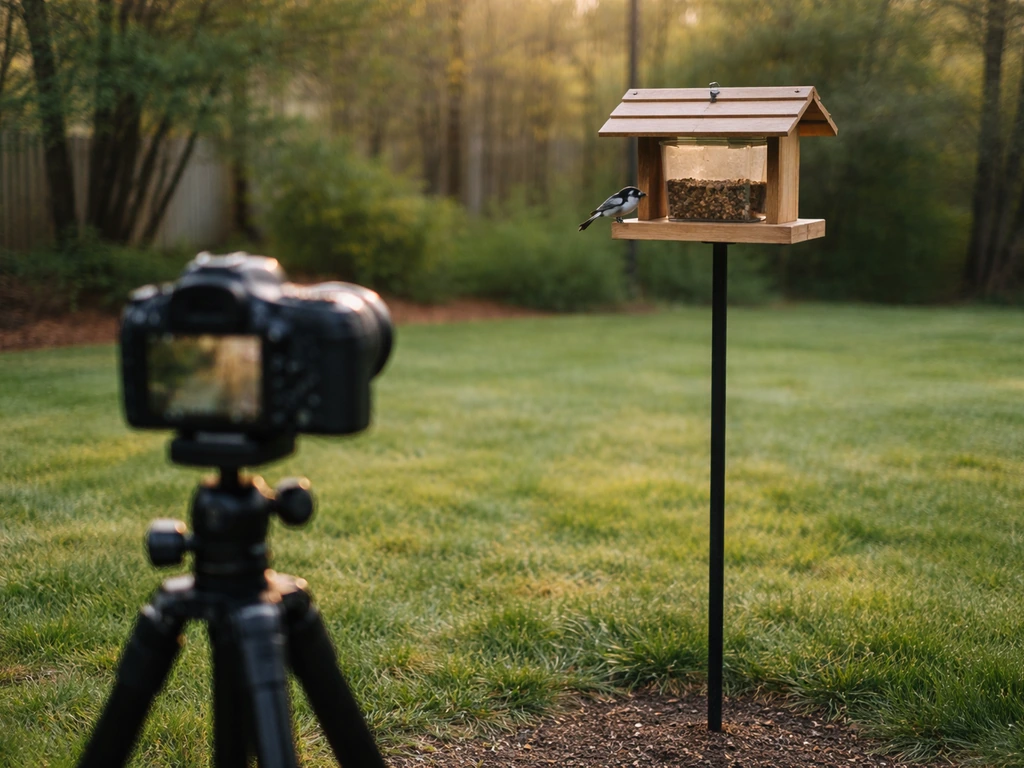
To get great bird photos from a feeder setup, you need three things working together: a feeder that attracts the exact birds you want, placed where light hits it well and the background is clean, with your camera (or feeder camera) close enough to fill the frame but far enough not to spook the birds. The core setup I keep coming back to is a pole-mounted feeder with a squirrel baffle, positioned 10 to 15 feet from natural cover, with a shooting distance of 10 to 20 feet and a 400mm or longer lens. Everything else is tuning from there.
Bird Feeder Setup for Photography: Step-by-Step Guide

Marcus Holloway
5 Jul 2026
Start with your photo goals and your target species
Before you buy a single feeder or stake down a pole, decide which birds you actually want to photograph. This isn't just about aesthetics. Your target species determines every other decision: feeder type, seed, mounting height, and how much patience you'll need. Chasing cardinals is a completely different setup from chasing hummingbirds or woodpeckers.
Cardinals are big, slow, and come to platform or hopper feeders reliably, they're one of the most forgiving subjects for beginners. Finches cluster on tube feeders and rarely sit still, so you'll be shooting at higher shutter speeds. Woodpeckers cling to suet cages and hold position long enough to get multiple frames. Hummingbirds are the hardest: they move fast, they're small, and they require nectar feeders specifically designed for them. Grounding your whole setup in one or two target species will save you from a cluttered yard that produces mediocre photos of nothing in particular.
- Cardinals and grosbeaks: platform or hopper feeders, black oil sunflower seed, 4 to 5 feet off the ground
- Finches (goldfinch, house finch): nyjer/thistle tube feeders, small perch ports, 5 to 6 feet high
- Woodpeckers and nuthatches: suet cages or log-style feeders, hung or pole-mounted near tree trunks
- Hummingbirds: red nectar feeders hung at chest height on a shepherd's hook, ideally near flowering plants
- Chickadees and titmice: mixed seed in a tube or hopper feeder, very tolerant of close cameras
Choose the right feeder type for photo-friendly bird behavior
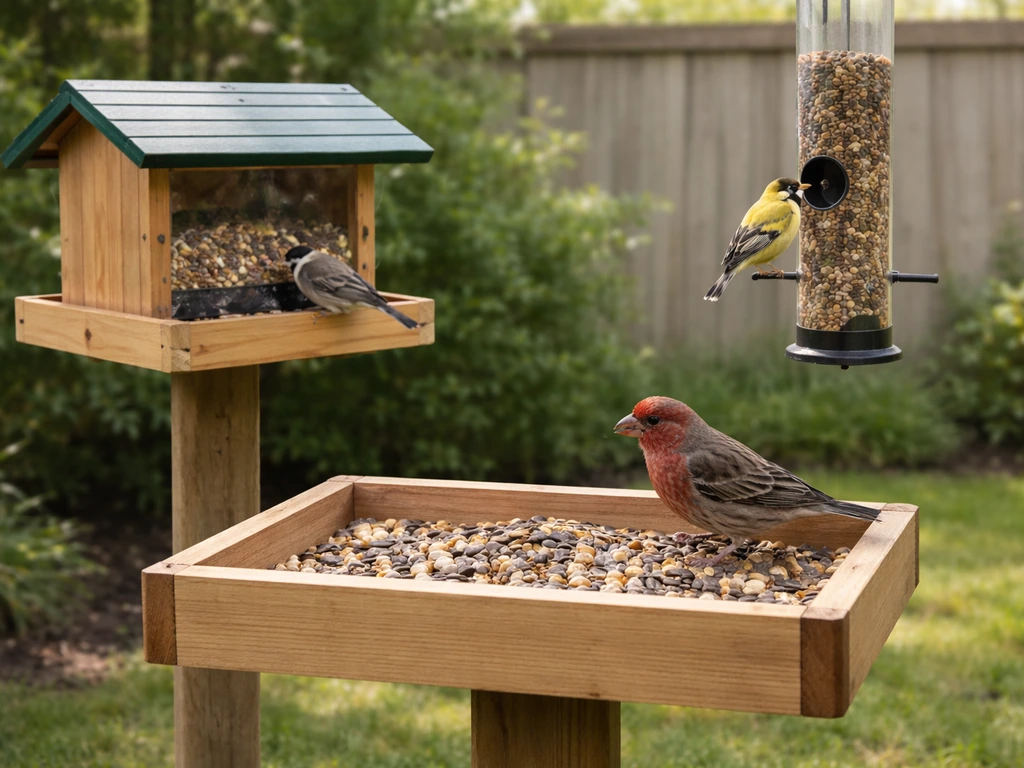
Not all feeders produce photogenic moments at the same rate. A platform feeder with a wide, open tray lets birds stand in full view with nothing blocking them, which is ideal for photography. If you're hunting specifically for the best photo bird feeder, start by matching the feeder type to your target species and then tune placement for clean background separation platform feeder.
The trade-off is that it attracts grackles, house sparrows, and squirrels at roughly the same rate as the birds you want. Tube feeders with small ports are more selective: they favor finches and chickadees and physically exclude larger pest species. Suet cages pin woodpeckers and nuthatches to a flat vertical surface, which gives you predictable posture and angle, really useful when you're dialing in a composition.
For pure photography value, I'd rank feeder types roughly like this: platform feeders give you the most natural-looking shots with birds in the open, suet cages give you the most consistent positioning, and tube feeders give you the most activity and variety. If you want the best bird feeder for photography overall, start by matching the feeder type to the species you want to shoot, then tune placement and light to improve your keeper rate. Hummingbird feeders are a category of their own, you're not going to attract hummers with anything else, and a clean clear-bodied feeder lets you see the bird without a feeder wall blocking the shot.
One practical note on feeder design: feeders with large, flat perch bars tend to show birds face-on or in profile more often than feeders with skinny dowel perches where birds twist around awkwardly. That matters when you're reviewing hundreds of burst shots. Also consider feeder color against your background. A bright red hummingbird feeder against a leafy green hedge looks better than a red feeder against a red brick wall.
Placement strategy: height, distance, angle, and background control
This is where most people underinvest, and it shows in their photos. A mediocre feeder in a great location beats a great feeder in a mediocre location every time.
Height and cover distance
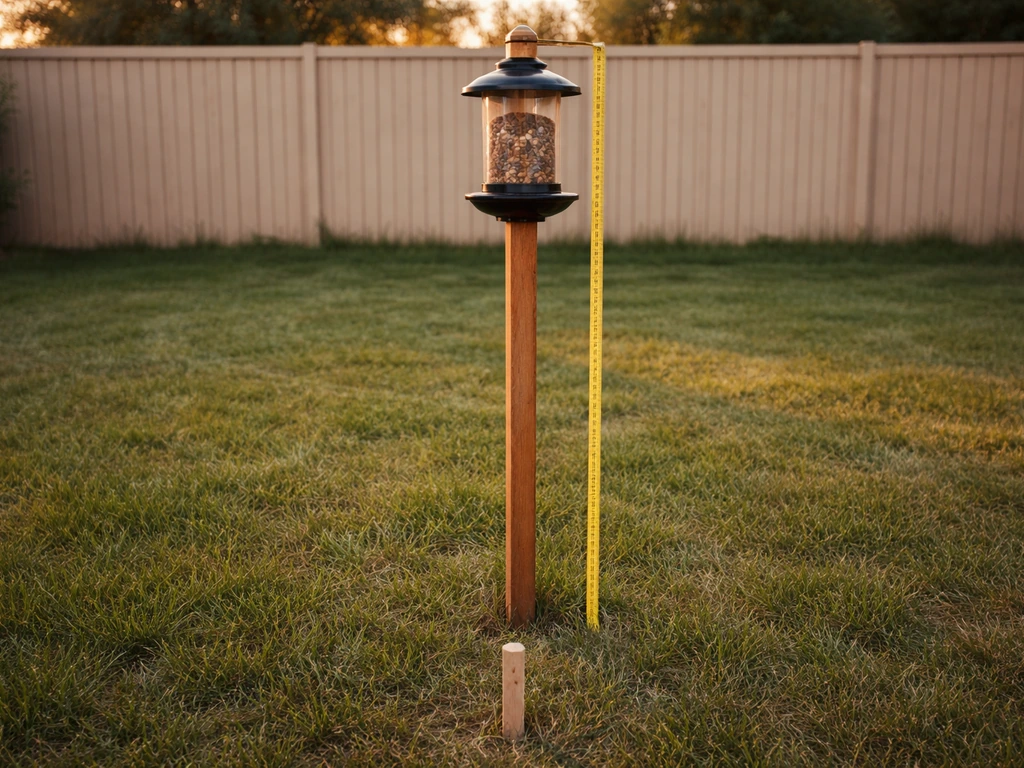
Audubon recommends pole-mounted feeders at roughly five feet off the ground, and that's a solid starting point for most species. If you're unsure where to start, use the best height for bird feeders as your baseline and then fine-tune based on your birds' comfort and nearby cover. Hummingbird feeders work well at chest height on a tall shepherd's hook. The key relationship isn't just height off the ground, it's the distance from the nearest cover.
Birds need to feel safe enough to land and stay. Position your feeder 10 to 15 feet from shrubs, bushes, or trees so birds have an obvious escape route. This cover also serves double duty: you can add a natural-looking stick or branch between the cover and the feeder as a staging perch, which is where some of the best shots happen.
Shooting distance and lens
A working distance of 10 to 20 feet from the feeder with a 400mm lens will fill the frame with most backyard species without putting you close enough to flush the birds. If you're trying to decide the best place to put a bird feeder with a camera, start with this same 10 to 20 foot working distance and then fine-tune the background for clean subject separation best place to put bird feeder with camera. If you're using a feeder camera rather than a standalone rig, that camera is obviously fixed at the feeder, but for DSLR or mirrorless setups, staying back and using a longer focal length consistently produces sharper, more flattering images than crowding in with a 70-200mm.
Background control
A distant background separates the bird from the clutter behind it far better than a close fence or wall. Audubon specifically recommends prioritizing a distant background over a close one, and this is the piece of advice that makes the single biggest visual difference in feeder photos. Even a plain expanse of lawn 30 feet behind the feeder will produce cleaner subject separation than a wood fence two feet back. If your yard is constrained, shooting with a wider aperture (f/5.6 to f/8 on a telephoto) increases that separation even more.
Angle matters too. Because birds orient their faces toward the food source, your feeder and your shooting position should ideally be in roughly the same plane, meaning you're not shooting the bird's back. Audubon's guidance on perch setup makes this point clearly: if the feeder is to the bird's right and you're shooting from the left, you'll mostly photograph the back of its head. Position yourself at the same angle the bird faces when it's eating. A movable pop-up photography blind lets you shift angle and background without rebuilding your whole setup.
Lighting and timing: get usable shutter speeds and real contrast
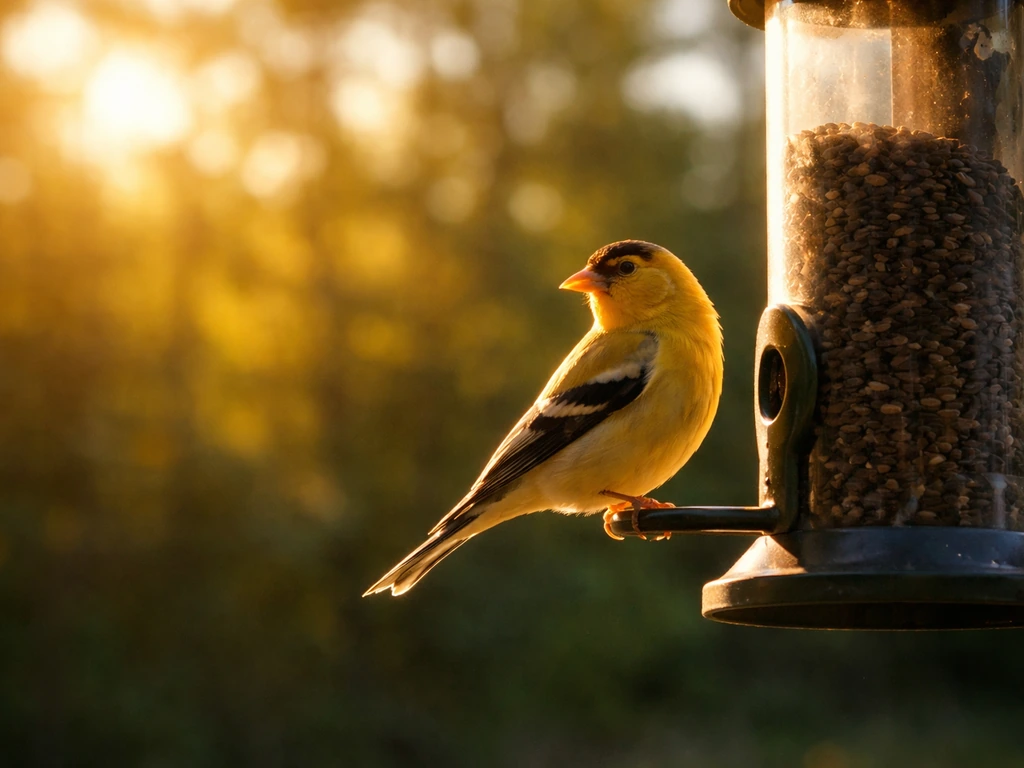
Light is the variable you control the least, so set your feeder up to take advantage of what you have. The classic advice is to face your shooting position toward the sun, putting the light behind you and on the bird's face. The first two hours after sunrise and the hour before sunset give you warm, low-angle light that makes feathers glow. Midday overhead light produces flat, harsh shadows in eye sockets that ruin otherwise sharp photos.
For shutter speed, the rules of thumb I use: 1/1000s is the bare minimum for a perched bird that might move. Shoot at 1/2000s if there's any flight or wing movement happening around the feeder. For small fast birds like finches and sparrows, aim for 1/3200s. For hummingbirds with their rapid wing beats, you want 1/3200s to 1/4000s or faster just to freeze the wings. Set Auto ISO with an upper ceiling of ISO 3200 to 6400 and let the camera find exposure, don't let it slow your shutter below your target speed to save ISO.
Overcast days are underrated. Smart feeder cameras like the Birdfy Wood have been noted to capture detailed feather texture on typical grey days precisely because the diffuse light wraps around the bird without harsh shadows. For static feeder camera setups, you don't get to choose your moment the way you do with a handheld camera, so a setup with soft consistent light beats a setup that's spectacular for 20 minutes at dawn and blown-out the rest of the day.
One practical setup note: avoid placing your feeder where the camera or your lens points directly into the rising or setting sun. Backlit sky blows out detail and flares the image. If you're using a dedicated feeder camera, mount it slightly above the feeder and angled down about 10 to 20 degrees below horizontal, this kills the harsh sky behind the bird and keeps the subject against a ground-level background instead.
Mounting and stability: predator-proofing without rattling your shots
A feeder that sways, rattles, or gets knocked over mid-session is a photography problem as much as a bird welfare problem. For pole-mounted feeders, use a heavy-gauge steel pole driven firmly into the ground, the kind you can hang a squirrel baffle from without it flexing in wind. Lightweight shepherd's hooks wobble in a breeze and will blur every shot on a windy day.
Squirrel baffles and placement rules
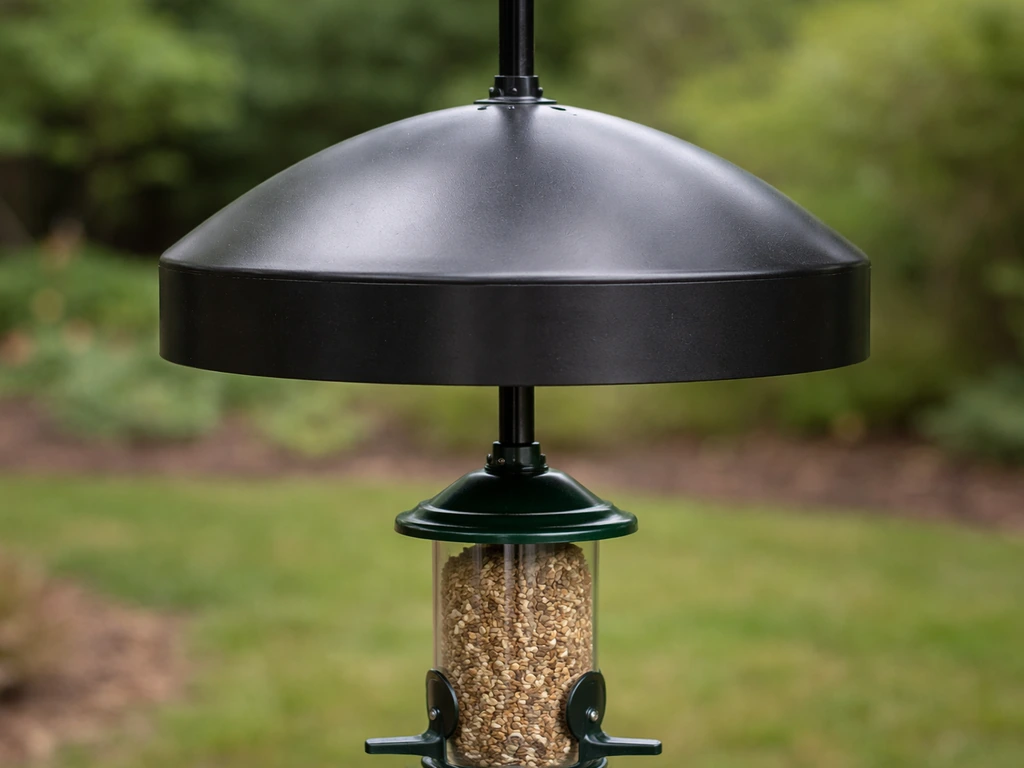
Squirrels don't just eat your seed, they knock feeders around, spook birds, and dominate your shooting window for minutes at a time. Audubon is honest that there's no truly squirrel-proof setup, but the closest practical approach is: a pole-mounted feeder with a cone-shaped baffle of at least 17 inches diameter positioned below the feeder, placed at least 4 feet off the ground, and located at least 10 feet away from any branch, roof, or structure a squirrel could jump from. A metal stovepipe-style baffle around the pole works on the same principle. If you're inside those distance thresholds, squirrels will leap and land regardless of the baffle.
From a photography standpoint, baffles also reduce feeder movement because squirrels can't grab the feeder and shake it from below. It's a dual win. I've had feeders last seasons longer when they weren't getting physically abused by squirrels every morning.
Wind and rattle reduction
If you're mounting a camera directly on or near the feeder, vibration becomes a real issue. Feeder cameras with magnetic or clip mounts can rattle loose in wind, which introduces micro-blur even in still conditions. Use a rubber gasket or adhesive foam between the camera mount and the feeder surface. For traditional camera setups on a tripod nearby, use a remote shutter release or interval timer so you never physically touch the camera during a session.
Feeding setup details: perches, seed choice, and minimizing spooking
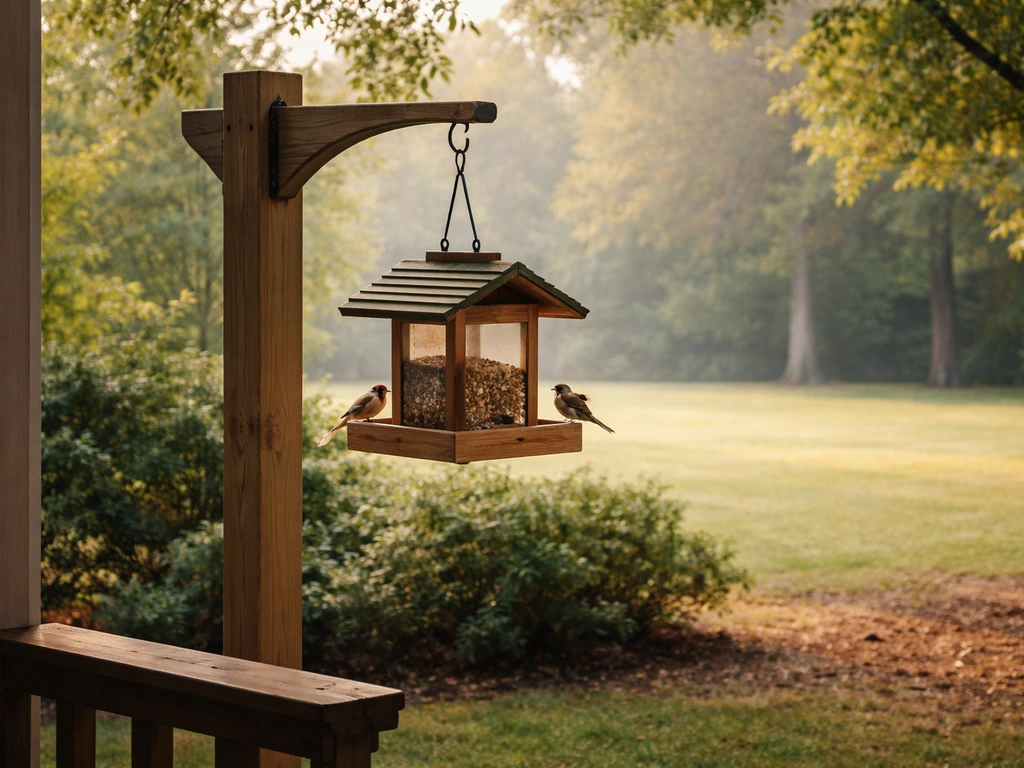
The feeder itself is just the anchor. The staging perch between the cover and the feeder is often where the best photos happen, because birds land there first to survey the scene before committing to the feeder. Add a natural branch or a piece of driftwood 3 to 5 feet from the feeder at roughly the same height. Birds will use it reliably, and it looks far more natural in photos than a perch rod bolted to a metal feeder tube.
Seed choice directly affects which species visit and how often. Black oil sunflower seed attracts the broadest range of desirable photo subjects, cardinals, chickadees, nuthatches, woodpeckers, and finches all take it. Nyjer/thistle seed in a sock or tube feeder attracts goldfinches almost exclusively, which is great if that's your target. Safflower seed has the added benefit of being less attractive to squirrels and grackles while cardinals love it. Avoid cheap mixed seed with milo and millet as the main filler, it mostly attracts house sparrows and doves and creates a mess on the ground that draws rodents.
To minimize spooking, introduce your camera setup gradually. Put the tripod or camera housing in place without the camera for a day or two before you start shooting. Birds habituate to new objects in their environment, but they'll flush consistently if something new appears right next to a feeder they've been using.
To dial in the best bird feeder setup, start by matching your feeder type and seed to your target species, then tune placement and timing for cleaner, sharper photos. The same logic applies to smart feeder cameras: TechRadar's testing found birds may take a day or two to discover and settle into a new feeder camera setup.
TechRadar also discusses Bird Buddy Pro’s subscription feature set and how to install the Nature Cam module onto an existing feeder using cable separation, recess, and magnet details TechRadar's testing found birds may take a day or two to discover and settle into a new feeder camera setup. .
Don't expect great captures on day one.
Smart and AI feeder cameras vs. traditional camera setups
These are genuinely different tools for different goals, and the right choice depends on how involved you want to be in your photography workflow.
| Feature | Smart/AI Feeder Camera | Traditional Camera (DSLR/Mirrorless) |
|---|---|---|
| Setup effort | Low — clip or mount on feeder, connect to app | High — tripod, remote, manual settings |
| Image quality | Good to very good (2K on models like Bird Buddy Pro) | Excellent — full sensor, interchangeable lenses |
| Species ID | Built-in AI on models like Bird Buddy, Birdfy | Manual identification required |
| Flexibility | Fixed angle and distance | Full control of angle, distance, focal length |
| Passive use | Yes — captures automatically when birds visit | No — requires you to be present or on intervalometer |
| Cost | $50–$250 for most units | $500–$3000+ for camera, lens, and support gear |
| Best for | Consistent daily capture, journaling, species logging | High-quality prints, portfolio work, action shots |
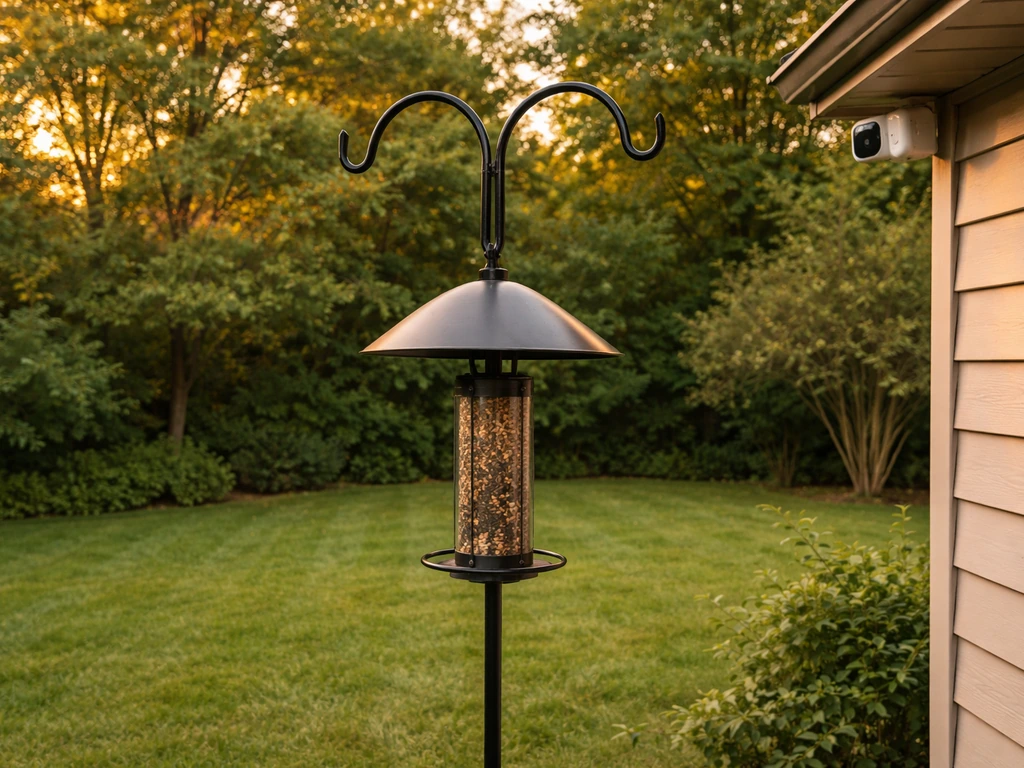
If you want to document bird visits without babysitting the setup, a smart feeder camera like the Bird Buddy Pro (with its 2K Nature Cam module) or the Birdfy Feeder Wood is the right call. Both use AI species recognition and capture stills and video automatically. The Birdfy Wood in particular has impressed reviewers with its feather detail even in low contrast conditions. The Camouflage EZ BirdFeed takes a wide-angle approach at 130 degrees, which captures more of the scene but individual birds appear smaller in the frame.
For print-quality work or action shots during flight, a traditional camera on a tripod with a remote shutter wins outright. Audubon's hummingbird photography guidance specifically recommends using a remote release so you can stay at distance while birds feed, this is hard to replicate with a feeder-mounted camera. The practical middle ground is to run a smart feeder camera for daily passive capture and set up a traditional rig during peak light windows when you want serious images.
One honest limitation of smart feeder cameras: the camera is physically fixed at the feeder, so the shooting angle and distance are determined by feeder design, not your creative preference. Some setups, noted in user experience reports, put the camera so close that birds filling the frame to eat come out distorted or cropped. Mount the camera housing so the bird's full body is in frame when it's at the feeding port, not just its beak.
Quick troubleshooting for common problems
Squirrels dominating the feeder
First check the geometry: is the pole at least 10 feet from any launching point (branch, fence, roof, shed)? Is the baffle at least 17 inches in diameter and positioned at least 4 feet off the ground? If both are correct and squirrels are still getting through, they're likely jumping from below and landing on the baffle rim, switch to a longer, wider dome-style baffle. Switching to safflower seed also reduces squirrel interest without driving away cardinals.
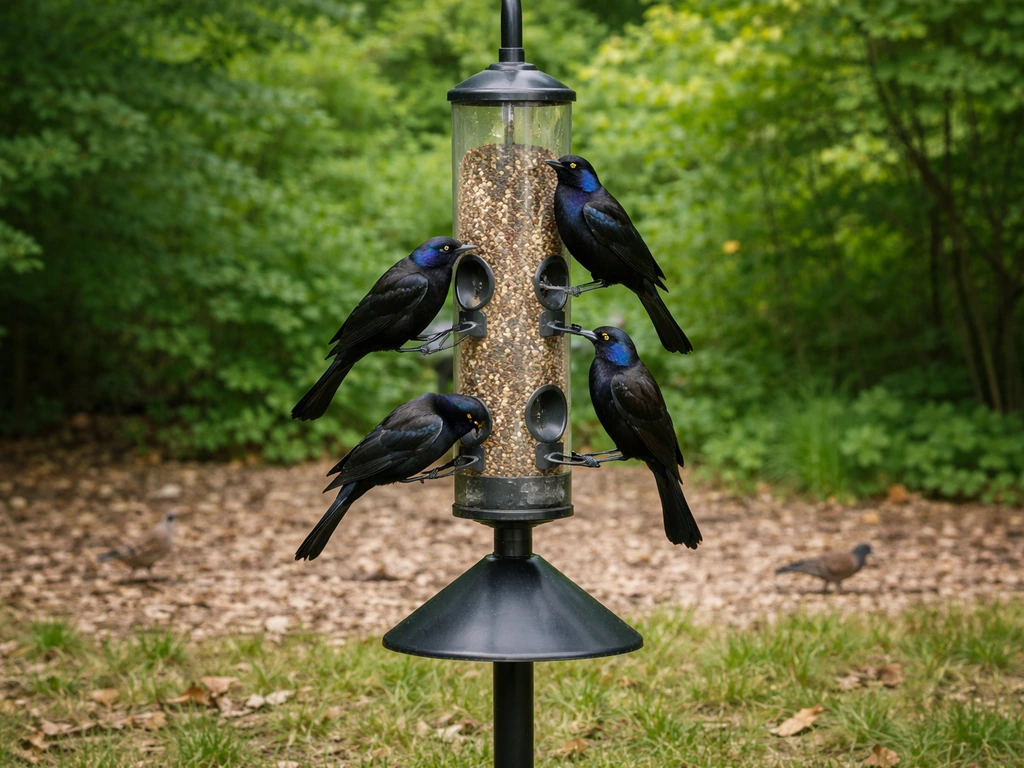
Grackles taking over
Common grackles are big, bold, and intimidate smaller birds away from feeders. They dominate platform feeders and large hopper feeders. The most effective counter is switching to a tube feeder with small ports they can't access, or a weight-sensitive feeder that closes under a grackle's body weight but stays open for lighter birds. Removing cracked corn and milo from your seed mix also cuts grackle interest significantly, since those are their preferred filler seeds.
Low bird activity
If birds aren't showing up, the first questions are: is the feeder visible from bird flight paths (not tucked completely behind a building or thick canopy), and is it within 10 to 15 feet of cover? New feeders take time, give it a week before assuming something is wrong. If the feeder has been inactive for more than two weeks, check whether the seed has gone stale or moldy, especially in humid weather. Bad seed drives birds away faster than almost anything else.
Blurry images
Blur usually comes from one of three sources: shutter speed too slow for the bird's movement, feeder or camera movement from wind or squirrel activity, or autofocus losing the bird against a busy background. Bump your minimum shutter speed, 1/1000s for perched birds, 1/2000s for active feeders with lots of wing movement. Check that your pole isn't swaying. And if your autofocus is hunting, switch to a single focus point aimed at the feeder port rather than letting the camera choose its own subject.
Feeder camera not capturing reliably
If your smart feeder camera is missing visits or producing poor captures, check the motion trigger sensitivity in the app settings first. Units like Bird Buddy require firmware updates that can affect detection behavior, update via your phone's Wi-Fi hotspot if you don't have a router nearby. Also verify the camera lens isn't obscured by seed dust, which accumulates faster than you'd expect on a feeder-mounted unit. Clean the lens every time you refill.
FAQ
How do I choose a feeder setup for photography when I do not know which birds will visit my yard?
Start with one general-purpose feeder plus one high-visibility perch. For photos, a platform feeder in a clean spot near natural cover gives you the widest first-round learning. Then adjust seed to shape the mix, for example black oil sunflower as a broad baseline, and only switch to specialized feeders (suet, tube, hummingbird) after you identify your top 2 to 3 visitors over several days.
What is the best placement if my yard does not have 10 to 15 feet of open space from cover?
If you cannot keep the feeder 10 to 15 feet from shrubs or trees, prioritize a distant background and reduce spooking by using a shorter staging perch near the feeder rather than moving the feeder too close to cover. You can also increase your camera distance and use 400mm or longer to keep your presence from becoming the main disturbance.
How high should I mount the feeder if I am mainly photographing small birds like finches or chickadees?
Use a slightly higher mounting height than a beginner baseline when small birds cluster at lower branches, but keep the feeder reachable and comfortable for landing. Practically, target a height where birds can land without hopping down from a risky perch, then confirm by checking landings and approach paths for a few sessions. If they keep arriving but never feed, your height or distance to cover is likely wrong.
Do I need a squirrel baffle even if I do not see squirrels at the feeder yet?
Yes, but you can start with a preventive baseline. Place a properly sized baffle early and ensure the setup blocks access from the most likely jump points, branches and roofs included. Once squirrels learn a route, it is often harder to retrain the birds and harder to stop feeder movement than it is to prevent the first visits.
What should I do if birds keep feeding briefly then leaving, even though the feeder is attracting them?
Treat it like a habituation and disturbance problem. Slow down your changes, introduce new items gradually (no abrupt camera, tripod, or blind movement), and stay consistent with lighting and angle so they see the same “safe landing” plan each time. Also check for feeder sway and for seed mess buildup, both can signal an unstable or risky station.
How can I prevent feeder seed from making a messy background in photos?
Use a feeder type that physically contains seed, and clear the ground under the feeder regularly so spilled seed does not create a cluttered dark patch behind the subject. For photography, even a clean lawn can look dirty if it has scattered seed, so plan a quick weekly cleanup and avoid refilling right before your main shooting window.
What autofocus settings help keep the bird sharp at feeder distances?
If autofocus is hunting, use single-point AF aimed at the feeder port or the expected head position rather than leaving it on wide-area subject selection. This is especially helpful with platform feeders where background branches can look “contrasty” to the autofocus sensor.
How do I adjust exposure without letting shutter speed drop during fast bird moments?
Lock your priority around shutter speed first, then control exposure with Auto ISO caps. Keep Auto ISO enabled but set a practical maximum, so the camera raises ISO rather than slowing below your target speed. If your ISO hits the ceiling often, you likely need more light timing (golden hour, overcast) or a wider aperture within your lens limits.
What should I check if the feeder camera is recording visits but birds are blurry or missed?
Verify three common causes: motion trigger sensitivity (app settings), lens cleanliness (seed dust accumulates fast), and mounting stability (vibration can reduce sharpness). If updates are pending, apply firmware updates because detection behavior can change after releases. Finally, confirm that the camera angle gives the bird’s full body at the feeding port, not only the beak.
How do I reduce the “birds are too small in frame” problem with a feeder-mounted camera?
Change the feeder-camera geometry rather than hoping to crop later. Move the camera or feeder so the bird’s body fills the relevant area at the feeder port, and avoid designs where the camera sits too close to the perch so it distorts or crops. If the feeder design cannot be changed, switch to a traditional tripod setup for your peak light sessions.
Are platform feeders always better for photography than tube feeders?
Not always. Platform feeders show birds in the open and often make composition easier, but they also attract larger competitors that can push smaller birds out or create busy frames. If your priority is subject isolation and faster keeper rates with small birds, tube feeders with small ports can be more effective, even if individual birds look slightly more “patterned” due to the narrower access point.
What is the safest way to introduce a new feeder without spooking birds?
Place the feeder and keep your physical behavior consistent, then add the camera setup gradually. You can set up the feeder housing first, wait for repeated landings, and only then begin your full shooting routine. This reduces the “new object appears beside the station” reaction that causes repeated flushes.
How do I handle hummingbird photography if the feeder placement rules conflict with my need for clean backgrounds?
For hummingbirds, the feeder must prioritize stable access height and nectar feeder design, then you tune the background with angle. Instead of moving the feeder too close to a busy wall, use the same feeder position but shift your shooting angle or add a staging element to keep the bird framed against a simpler distance background.
My setup meets the squirrel distance guidelines, but squirrels still get through. What is the next change to try?
First, reassess jump origins. Squirrels often attack from unexpected routes like nearby roof edges, vertical poles, or a feeder-adjacent branch. If the baffle is already correctly sized and positioned, switch to a longer and wider dome-style baffle and consider switching seed from sunflower to safflower to reduce squirrel interest without fully abandoning the birds you want.
Next Articles
Best Position for a Bird Feeder: Placement Tips
Find the best position for a bird feeder: height, sun, wind, spacing, predator-proofing, and fixes for problem birds.

Best Photo Bird Feeder: Camera Specs, Setup, and Picks
Compare the best photo bird feeders with cameras for crisp day and night shots, smart alerts, and predator-proof setups.
Best Bird Feeder Setup: Placement, Predator Proofing, and Tech
Get the best bird feeder setup: placement, weatherproofing, squirrel-proofing, grackle control, and smart camera/AI setu